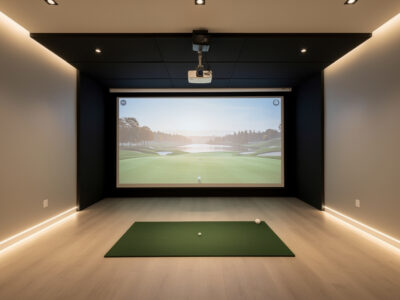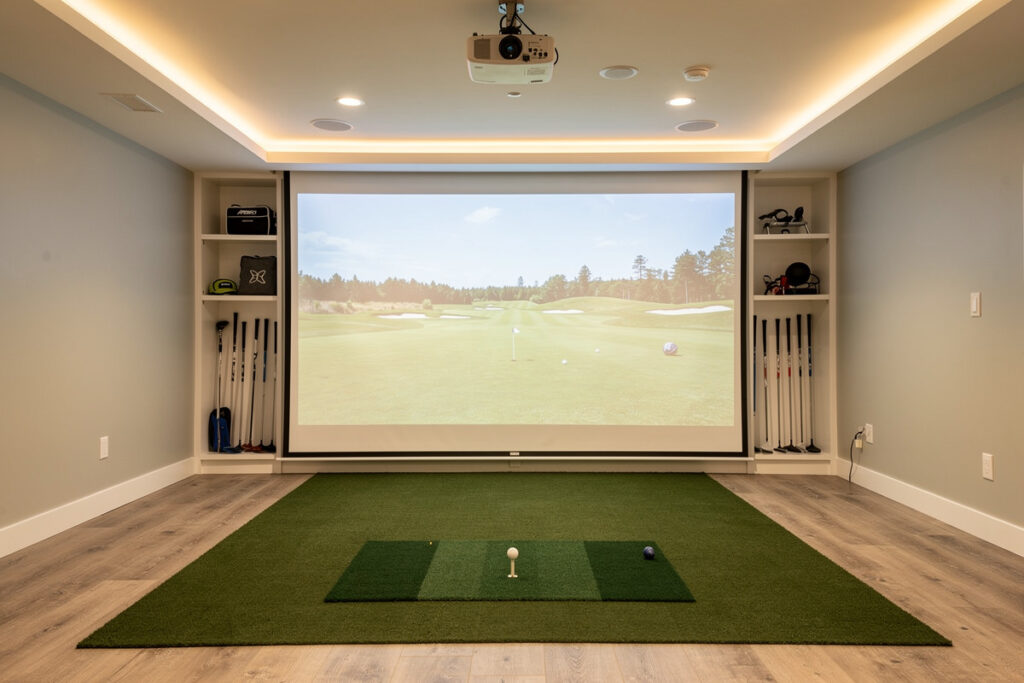
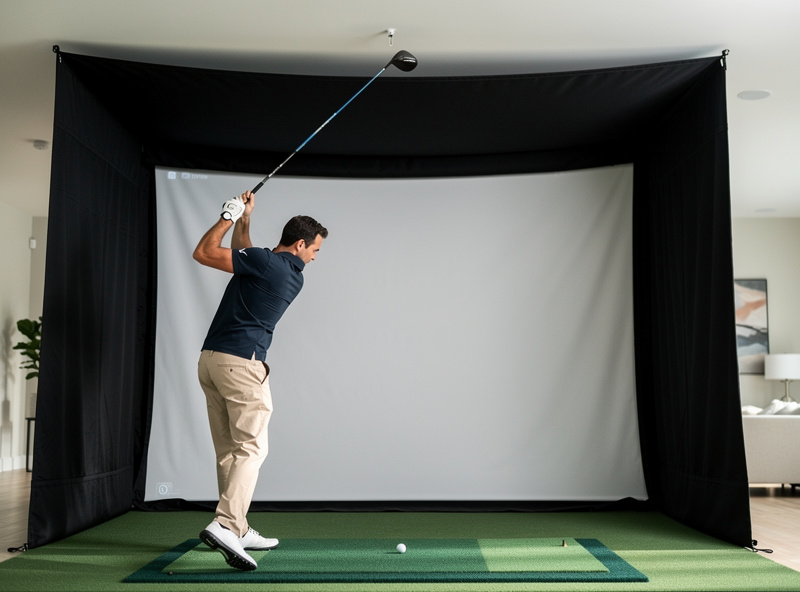
A home golf simulator needs a room with roughly 10 feet of ceiling height, 12 feet of width, and 15 feet of depth for a right- and left-handed adult to swing a driver freely and stand far enough back from the screen. Those are the numbers I check first, before anyone talks about launch monitors, because the room is the one component you usually cannot upgrade later.
I learned this the way most builders do: by measuring my own space twice, framing an enclosure into it, and discovering exactly where the driver clipped the ceiling on a full backswing. This guide is written from a tape measure, not a brochure. Below I break the room down into its three governing dimensions, give you a working minimum and a comfortable target for each, explain how your own height and swing change every figure, and link out to the deep-dive article on each dimension so you can size the exact corner, garage bay, or basement you have in mind.
The Room Is the First Component
The single most useful rule I can give you is this: the room decides what you can build, so measure it before you spend a krona. Ceiling height kills more sim dreams than budget does. A $600 launch monitor in a room with proper swing clearance produces more usable practice data than a $6,000 unit jammed into a space where you flinch on every driver.
Three dimensions govern everything. Height decides whether you can swing without hitting the ceiling. Width decides whether a player of your dominant hand can stand centered and swing without clipping a wall. Depth decides whether the ball has room to fly to the screen and whether you have room to stand a safe distance back from it. Each one has a hard physical floor and a comfortable target, and each interacts with your own height and the club you swing. Get all three right on paper and the rest of the build is shopping. Get one wrong and no amount of gear fixes it.
The order matters too. I always identify the limiting dimension first — the one your space is shortest on — and design the entire build around it. In most basements that is ceiling height; in most spare rooms it is depth; in garages it is usually the ceiling once you account for the door track. Find your binding constraint, accept it honestly, and you will make every later decision faster and cheaper.
Ceiling Height: The Make-or-Break Number
Plan for at least 9 feet of ceiling, with 10 feet being the comfortable target for most adults swinging a driver. Below 9 feet you start trading away clubs or swings; below 8 feet you are looking at a specialized low-ceiling approach rather than a conventional standing enclosure.
The reason ceiling height is so unforgiving is that the danger point is not the top of your backswing — it is the transition, where the clubhead travels fastest and arcs highest behind and above your head. A golfer who measures 6 feet tall needs meaningfully more clearance than someone at 5 foot 6, and a steep, upright swing eats more height than a flat, rotary one. There is also a hidden tax most guides skip: you lose a few inches to the floor build-up of a hitting mat and any sub-floor, and the enclosure frame’s top bar usually hangs an inch or two below the true ceiling. Measure to the lowest obstruction, not the joist.
I cover the height-by-height math, the simple test you can do with a club and a strip of painter’s tape before you build anything, and the realistic options when the number is tight in my dedicated golf simulator ceiling height guide. If your basement or garage comes up short, the low-ceiling golf simulator options article walks through choke-down swings, shorter shafts, half-swing practice value, and the monitor types that tolerate a restricted arc without throwing garbage data.
Room Width: Centering Both Handedness
Aim for 12 feet of width as the comfortable target and around 10 feet as a workable minimum, with the enclosure centered so the hitting position sits in the middle of the room. Width is where the right-handed-only crowd quietly gets away with less and the rest of us have to plan carefully.
The width you need depends on whether only one player uses the room and which hand they swing. A single right-handed golfer can be offset toward one side of the screen; the moment a left-handed player joins, or you want the hitting position centered for clean projector geometry, you need the full span so both stances clear their respective side walls. Wall proximity is a genuine safety issue, not just comfort — a driver swung too close to a wall is how people put a grip end through drywall, and it makes the swing tentative, which corrupts every number the monitor reports.
My room width for golf simulator breakdown gives you the centered-hitting math, the single-versus-dual-handed numbers, the side clearance a tall player actually needs at the top of the backswing, and how launch monitor placement — overhead versus side-mounted radar — changes the side room you have to leave open.
Room Depth: Ball Flight Plus Standback
Budget 15 feet of depth as a comfortable target and about 12 feet as a tight minimum, because depth has to absorb three separate distances stacked front to back: the screen offset from the back wall, the ball flight from the hitting position to the screen, and the standback room behind you for your own swing arc and any side-mounted monitor.
Depth is the dimension people most often underestimate, because the floor looks generous until you stack those three zones. The screen hangs a foot or more off the wall so the impact has somewhere to give. The ball needs a clear flight path to read properly and to keep bounce-back manageable. And you need real room behind the ball for the trail side of your swing plus, on a radar setup, several feet of clean Doppler read distance behind the strike.
Photometric (camera) monitors and radar (Doppler) monitors place different demands on this dimension. A side or behind-ball radar unit needs that clean read corridor; an overhead photometric unit frees up the floor behind you but adds a ceiling-mount consideration. The full layout, including the minimum ball-to-screen gap that keeps bounce-back safe, is in my golf simulator room depth guide. The closely related question of how far you personally should stand from the impact screen — for both projected image quality and ricochet safety — gets its own treatment in the golf simulator screen distance article.

Room Requirements at a Glance
Here is the working summary I hand people who message me with “do I have enough room?” These are the dimensions for a conventional standing enclosure with a full-length driver. Tighter numbers are possible with the workarounds linked above, but treat these as the targets you design toward.
| Dimension | Tight Minimum | Comfortable Target | What It Governs |
|---|---|---|---|
| Ceiling height | 9 ft | 10 ft | Driver swing clearance at transition |
| Room width | 10 ft | 12 ft | Centered swing, both-handed, wall safety |
| Room depth | 12 ft | 15 ft | Screen offset + ball flight + standback |
| Screen-to-hitter | 8 ft | 10+ ft | Bounce-back safety, image scale |
| Standback behind ball | 3.5 ft | 5 ft | Backswing room + side monitor read |
How Your Height and Club Change the Numbers
Every dimension above scales with the golfer, and the driver is always the limiting club. A 6-foot-2 player with an upright swing might need a full 10 feet of ceiling where a 5-foot-4 player is comfortable at 8 foot 6. The honest way to size your room is to measure your own swing arc, not to copy a number off a forum thread where nobody listed their height.
The test costs nothing. Take your driver, address an imaginary ball at your planned hitting position, and make a slow full swing while a helper watches the highest point the clubhead reaches against the wall behind you. Mark it, then add a few inches of margin for the fact that your real swing is faster, longer, and a touch wilder than your careful demo one. That measured arc — not your height in isolation — is the ceiling number to design around. I keep this method consistent across every room article on the site so the figures never contradict each other; the room is the first component, and it gets measured like one.
Width scales the same way. Taller players reach further across at the top of the backswing and need more side clearance before the club threatens a wall. Depth is the one dimension that scales less with height and more with your equipment choice, because the dominant variable there is where the launch monitor sits and how much read distance it demands.
Launch Monitor Placement Changes the Room
Before you finalize any dimension, decide roughly which class of launch monitor you will use, because the two main types reshape the room differently. A radar (Doppler) unit like a budget-tier reference monitor sits behind or beside the ball and needs several feet of clean read distance — that pushes your depth requirement up. A photometric (camera) unit reads at or near impact and a ceiling-mounted overhead version frees the floor entirely but demands a stable mounting height and good lighting.
This is not a small detail bolted on at the end. I have rebuilt the same room around different monitors and watched the usable floor space change by a couple of feet just from the read-distance requirement. If your depth is the binding constraint, leaning toward an overhead photometric setup can buy back the standback room a behind-ball radar would consume. If your ceiling is the binding constraint, the opposite trade can apply. Size the room and the monitor type together, not in sequence.
Garage, Basement, or Spare Room?
The three spaces most people build in each come with a signature constraint. Garages win on width and depth but usually lose on ceiling height and temperature; basements win on temperature and often depth but fight low ceilings, ductwork, and support posts; spare rooms are the tightest on all three but the easiest to keep climate-controlled and quiet.
The garage is the most common starting point and the most misunderstood, because the listed ceiling height rarely accounts for the garage-door track and opener motor that hang down into your swing path. Before you commit, read the garage golf simulator reality guide — it covers the door-track problem, insulation and cold-weather impact-screen behavior, condensation, and the floor-leveling issues that catch people who assumed a slab was flat (most slabs pitch toward the door for drainage). Whichever space you pick, the sequence is identical: measure the three governing dimensions, find your limiting one, and design the build around it rather than fighting it.
Climate, Flooring, and Light Are Part of the Room
A simulator room is more than three dimensions — it is an environment your gear and your swing have to live in. Temperature swings are the quiet enemy in a Swedish winter: a cold garage stiffens an impact screen and a cold golfer swings worse, and humidity swings can fog a projector lens and warp a hitting surface. If the space is not already conditioned, budget for that before the fun parts.
Flooring deserves a paragraph of its own. A hitting mat wants to sit dead level and flush with any surrounding floor so your stance is square and the ball sits at a true height; a slab that pitches or a floating floor that flexes will quietly skew your low point and your data. Lighting is the last piece most people forget — a projector image washes out in a bright room, so you want controllable light, ideally with the option to dim or kill the lights nearest the screen while keeping the hitting area visible. None of these change the headline dimensions, but every one of them changes whether the finished room is a joy or a chore to use.
A Sane Build Sequence Once the Room Checks Out
Once your three dimensions pass, the order of operations is what keeps a build from spiraling. First, lock the hitting position and confirm swing clearance with the tape-and-club test for every club you will hit. Second, set the screen and enclosure depth so the ball-to-screen gap stays safe. Third, fix the launch monitor placement and verify its read distance is clear. Only then do you mount the projector and dial alignment, because the projector throw depends on every distance you just set.
Doing it in this order means you never discover, three steps too late, that the monitor needs floor space the projector mount already claimed. It is the same discipline a sim-racing rig build rewards — measure the ergonomics first, mount the screen to them, and let the rest follow. Build the room to the swing, not the swing to the room.
Common Sizing Mistakes I See Most Often
After enough “do I have enough room?” messages, the same handful of errors keep surfacing, and every one of them is preventable on paper. The most common is measuring the ceiling to the joist instead of to the lowest real obstruction — the light fixture, the duct, the garage-door track — which is what your clubhead actually meets. The second is forgetting the floor build-up: a hitting mat plus any sub-floor raises your stance and steals an inch or two of effective ceiling, and that detail is covered in both the ceiling height guide and the low-ceiling options article.
The third recurring mistake is sizing depth for the ball flight alone and forgetting the standback, then ending up with your trail elbow nearly against the back wall — the room depth guide stacks all three depth zones so this does not happen. The fourth is treating screen distance as a comfort preference rather than a safety floor; the screen distance article explains why eight feet is a minimum, not a suggestion. And the fifth, almost universal among garage builds, is trusting the listed garage ceiling height — the garage reality guide exists specifically because that number lies to you. Width gets its own honest treatment in the room width guide, especially if a left-hander shares the space.
Why Room-First Buying Beats Monitor-First
The marketing for this hobby is built around the launch monitor because that is where the margin lives, but the room budget — space, screen, mat, and conditioning — buys more practice value than the next monitor tier. A correctly sized room with a budget monitor lets you swing freely and trust the experience; an oversized monitor in a cramped room produces flinchy data and a setup you stop using by February.
That is the doctrine this whole cluster is built on. Spend your first decisions on the dimensions you cannot change, build the enclosure to fit the space you actually have, condition it so you will actually use it, and let the launch monitor be the upgrade you make later once the room is right. Nobody selling monitors will tell you that, which is exactly why it is worth saying — and why every article linked above sizes the room first.
Frequently Asked Questions
What is the minimum room size for a golf simulator?
A practical minimum is about 9 feet of ceiling, 10 feet of width, and 12 feet of depth for an adult swinging a driver. Comfortable targets are 10 by 12 by 15 feet. Below 8-foot ceilings you need a specialized low-ceiling approach.
How much ceiling height do I need for a golf simulator?
Plan for at least 9 feet, with 10 feet ideal for most adults. The limiting point is the swing transition, where the clubhead arcs highest. Taller golfers and upright swings need more, so measure your own driver arc rather than relying on height alone.
Can I put a golf simulator in my garage?
Often yes, but the garage-door track and opener usually intrude into the swing path and reduce usable ceiling height below the listed number. Garages also need climate and floor-leveling attention. Measure swing clearance under the door hardware before committing.
How far should I stand from the impact screen?
Keep the hitting position at least 8 feet from the screen, with 10 or more feet preferred. This protects against ball bounce-back and scales the projected image properly. Closer than 8 feet raises ricochet risk and shrinks the visible ball flight.
Do left-handed golfers need a bigger room?
A room shared by right- and left-handed players needs the full width target of about 12 feet so the hitting position can sit centered. A single right-handed golfer can offset toward one side and get away with slightly less width.
Does the launch monitor type change the room size I need?
Yes. A behind-ball radar monitor needs several feet of clean read distance, increasing depth requirements. An overhead photometric camera frees the floor behind you but needs a stable mount height. Choose the monitor type and room size together, not in sequence.
Related Guides
- Golf Simulator Ceiling Height: How Much You Really Need
- Room Width for a Golf Simulator
- Golf Simulator Room Depth Explained
- Golf Simulator Screen Distance
- The Garage Golf Simulator Reality Check
- Low-Ceiling Golf Simulator Options
Related Guides — Complete Spoke List
Full spoke list of the Room Requirements cluster:
- “Golf Simulator Room Depth: The Three Zones Explained”
- “Golf Simulator Screen Distance: Safe and Sharp”
- “The Garage Golf Simulator Reality Check”
- “Low-Ceiling Golf Simulator Options That Actually Work”
- “Room Width for a Golf Simulator: Centered and Safe”
- “Golf Simulator Ceiling Height: How Much You Really Need”
More From This Site
Other guides across room requirements and the rest of the Virtualgolfmansion library:
- “Golf Sim Enclosure Blackout and Lighting Basics”
- “Projector vs TV for a Golf Simulator: Which to Choose”
- “How to Clean a Golf Impact Screen (and What Ruins One)”
- “Golf Sim Bounce-Back Safety: Screen Slack
- “EMT Conduit Golf Sim Enclosure Frame: A Build Walkthrough”
- “Golf Impact Screen Material: How to Choose for a Home Build”
- “DIY Golf Simulator Enclosure: Frame
- “Garmin R10 vs MLM2PRO: Radar or Camera on a Budget”
- “Which Budget Launch Monitor Data to Actually Trust”
- “Buying a Used Golf Launch Monitor: My Checklist”
- “The Best Launch Monitor Under $1
- “Radar vs Photometric: The Budget Launch Monitor Choice”
- “Garmin R10: The Honest Limits I Found”
- “Budget Golf Launch Monitors: What to Trust Under $1
- “Golf Simulator Room Depth: The Three Zones Explained”
- “Golf Simulator Screen Distance: Safe and Sharp”
- “The Garage Golf Simulator Reality Check”
- “Low-Ceiling Golf Simulator Options That Actually Work”
- “Room Width for a Golf Simulator: Centered and Safe”
- “Golf Simulator Ceiling Height: How Much You Really Need”