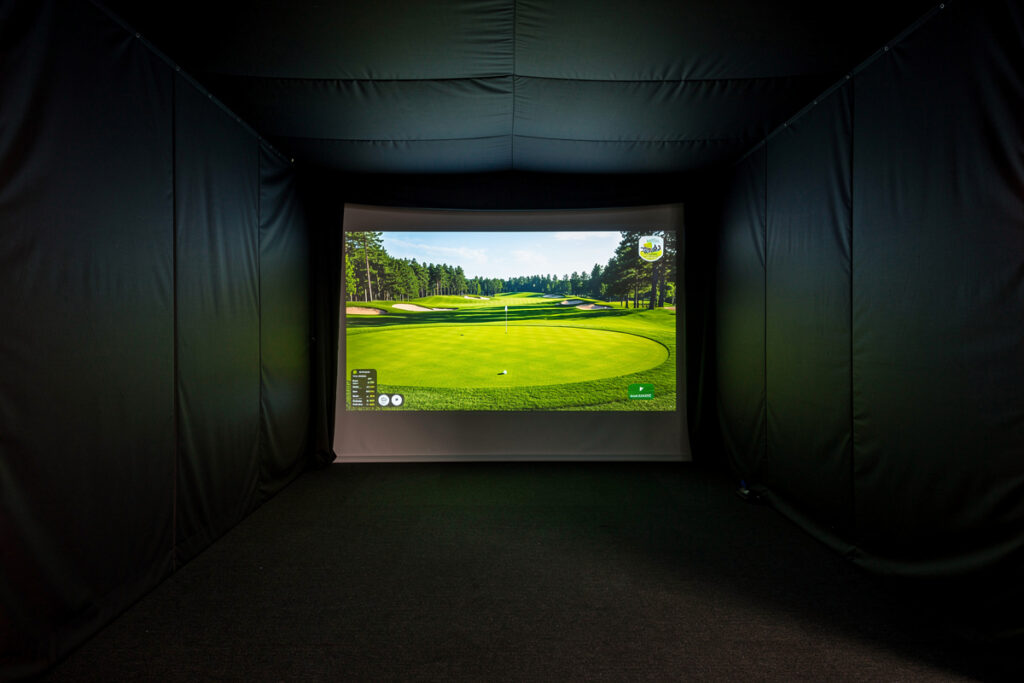
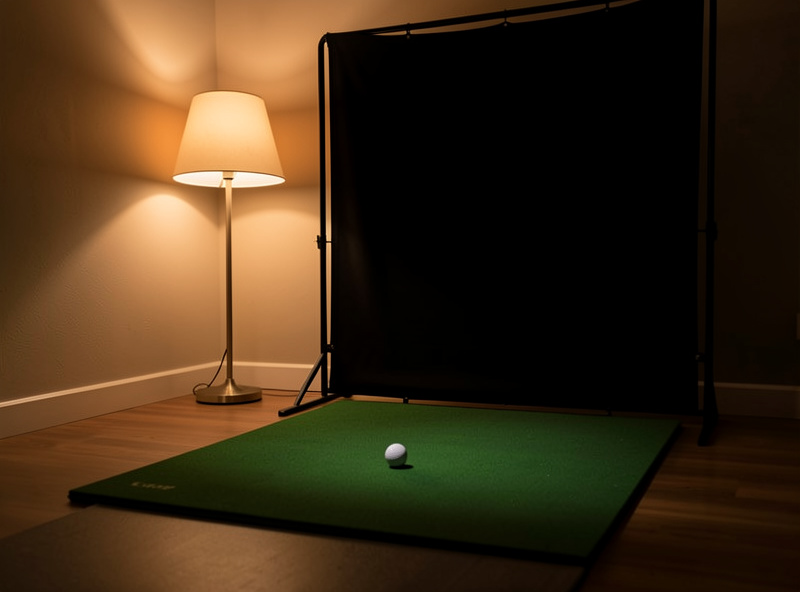
Black out the inside of a golf simulator enclosure with matte dark fabric so the projected image holds its contrast, then add one dim, indirect light outside the projection cone so you can see the ball at address. The enclosure interior wants to be dark and non-reflective; the hitting area wants a little soft light. Get these two opposites right and a modest projector looks far better than a bright one in a washed-out box.
This was the cheapest, biggest image upgrade in my whole build — a roll of matte cloth and one lamp pointed the right way beat any projector I could have bought for the money. It is enclosure-scoped lighting: making the image readable and the ball visible inside the box, not designing a whole room’s AV. Here is how I blacked out and lit my own DIY golf simulator enclosure.
Why Does the Enclosure Interior Need to Be Dark?
The enclosure interior needs to be dark and matte because any light or reflection inside the projection cone washes out the image’s contrast. A projector makes blacks by projecting no light — so a bright or shiny interior fills those blacks back in with stray light, and the picture goes flat. Matte dark fabric absorbs that stray light and lets the projected image keep its depth.
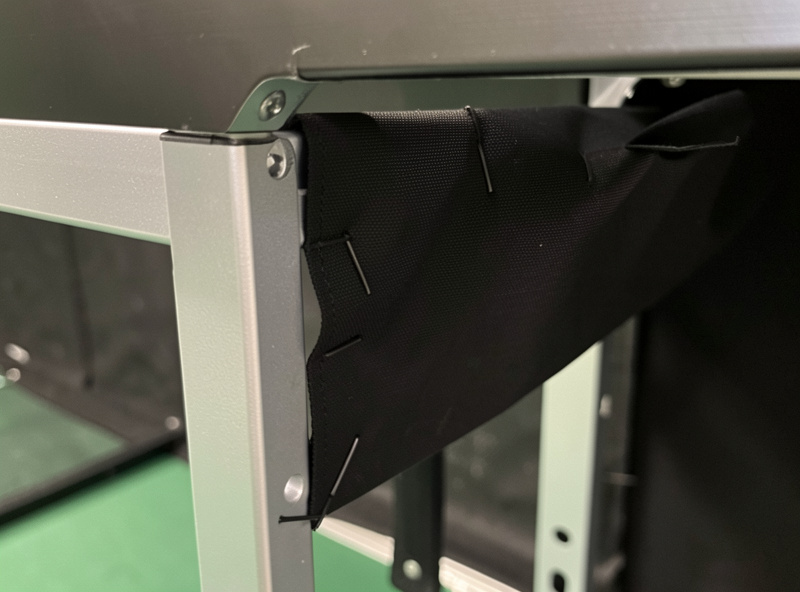
The competence point most people miss is that gloss is the enemy, not just brightness. A black-painted plywood side still reflects the projector and bounces light back onto the screen, washing contrast. Matte fabric does not. On my build I lined the enclosure sides with matte blackout cloth specifically so nothing inside the box reflects the beam. The result is deeper blacks and a more three-dimensional course image, all from killing reflections rather than spending on the projector.
It helps to picture what the projector is actually doing. To show a dark night sky or the shadow under a tree, it projects little or no light at those pixels — the “black” is just the screen lit by nothing. If the inside of your enclosure is throwing reflected light back at the screen, that black gets a grey wash and the whole image loses depth. Every reflective surface inside the box is quietly raising the floor of how dark your darks can be. That is why the cheap matte-fabric fix outperforms a brighter projector: a brighter projector raises the whites but does nothing for the blacks, while killing reflections lowers the blacks, and contrast is the gap between the two.
What Fabric Should You Use for Blackout?
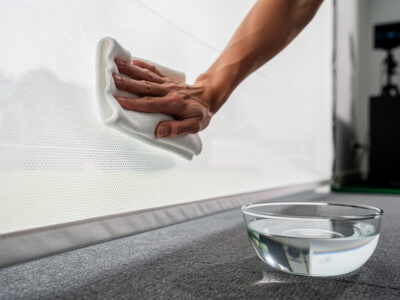
Use a matte, dark, light-absorbing fabric — proper blackout cloth or heavy matte curtain material — for the enclosure sides and any interior surface in the projection cone. Avoid thin liner that lets light bleed through and avoid anything with a sheen. The fabric’s job is to absorb stray light, so matte and dark are the only two properties that matter.
Thin curtain liner is the common mistake; it greys the image because light passes through and reflects off whatever is behind it. I use heavier matte cloth and keep it taut so it does not sag into the beam path. Color should be a true dark matte — deep grey or black — rather than a near-black with a glossy finish. Budget a couple of dollars per linear foot and cover every interior surface the projector can hit. Matte blackout fabric by the yard is inexpensive and the single best contrast upgrade for the money. As an Amazon Associate I earn from qualifying purchases.
How Do You Light the Ball Without Washing the Screen?
Light the hitting area with a single dim, indirect light placed outside the projection cone and aimed away from the screen, so you can see the ball at address without spilling light onto the image. Total darkness hides the ball; bright overhead light washes the screen. One soft, well-placed lamp threads the needle between the two.
In my room I put a dimmable lamp behind the hitting position, pointed at the floor and away from the screen, so it lights the ball and my stance without any of it reaching the projection surface. The key is keeping every light source out of the projector’s cone and off the screen face. Overhead room lights are the usual culprit — they pour straight onto the screen and flatten the image. Switch them off during a session and rely on the one indirect lamp; the contrast jump is immediate and obvious.
Dimmability matters because the right amount of light is “just enough.” You want to read the ball’s position and your alignment, no more. Too much and even an off-axis lamp starts to lift the screen’s blacks through ambient bounce; too little and you are addressing a ball you can barely see. A dimmer lets you dial it to the floor of usefulness, which is also the floor of screen interference. I keep mine low — enough to tee up confidently and no brighter. A warm bulb reads more comfortably than a harsh white one for the long winter sessions, and it spills less obviously if any does reach the edges of the screen.
Why Are Blackout and Lighting Two Opposite Jobs?
Blackout and lighting are opposites because the projection cone wants darkness and the hitting zone wants light, and they sit inches apart. Inside the cone you absorb light for contrast; just outside it you add light to see the ball. The whole trick of enclosure lighting is keeping these two zones separate so neither spoils the other.
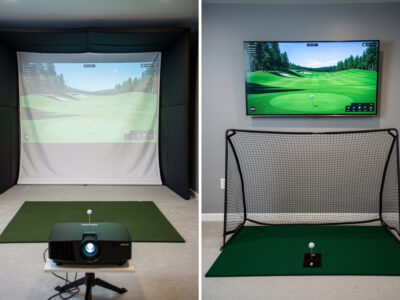
People treat it as one problem — “how bright should the room be” — and get it wrong in both directions. The answer is zonal: dark and matte where the image lives, soft and indirect where you stand. I think of it as two jobs with a hard boundary at the edge of the projection cone. This is exactly why this is enclosure-scoped lighting and not whole-room AV design: it is about the box and the ball, a contained problem you solve with fabric and one lamp, not a lighting plan for the entire space. Get the room itself right first with the room requirements guide, then handle the enclosure’s light zones.
Don’t Forget the Ceiling and Floor
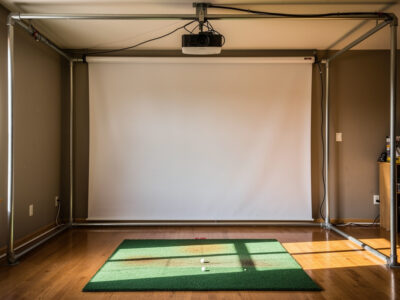
Black out or darken the ceiling above the projection cone and avoid a bright, reflective floor in front of the screen, because both bounce stray light back onto the image. People line the side walls and forget that a white ceiling or a glossy floor is just another reflective surface inside the box. Matte and dark on every surface the beam can reach is the rule.
On my build the ceiling ahead of the projector is the surface I almost overlooked — a light ceiling reflected the beam’s spill straight down onto the screen face and greyed the top of the image. A matte dark panel or fabric across that section fixed it. The floor matters less because it is below the cone, but a glossy floor right at the screen base can still throw light up; a dark mat or runner there helps. Think of the enclosure as a box where every interior face counts, not just the two side walls everyone remembers to cover.
Should You Add LED Strips or Effect Lighting?
Skip decorative LED strips inside the projection cone; if you want ambiance, put any effect lighting behind the hitter or outside the enclosure where it never touches the screen. Colored or bright strips inside the box are exactly the stray light that washes contrast. The enclosure interior is for absorbing light, not adding it.
I understand the appeal of a glowing setup — the man-cave look is half the fun for a lot of builders — but the moment that light reaches the screen, the image suffers. If you want the effect, mount strips behind the hitting position facing away from the screen, or around the room outside the enclosure entirely. Inside the box, every photon you add is a photon fighting your projector. Keep the ambiance outside the cone and the image stays sharp; that is the one discipline that lets you have both a good-looking room and a good-looking image.
What About Rooms With Windows?
Cover windows in the projection’s sight line with blackout curtains or panels, because daylight is the hardest light to fight and it washes the screen worse than any lamp. A room you can fully darken lets a modest projector shine; a bright room defeats even a powerful one. Controlling daylight beats buying brightness every time.
My sim room is in a Swedish basement, so daylight was never my problem, but the principle holds anywhere: if a window throws light onto the screen, block it rather than crank up the projector. Temporary blackout panels or curtains over the offending windows do the job and come down when the room is used for something else. This ties back to where the enclosure goes in the first place — a corner away from direct window light is easier to black out, which is one more reason the room layout decisions in the build come before the fabric goes up. The enclosure’s contrast is only as good as your control of the light around it.
If your only available room has unavoidable daytime light, the honest fix is to play it on schedule — sims shine in the evening anyway, which is when most of us use them. A removable blackout panel that snaps over the window for a session, then comes off, keeps the room usable for everything else while still giving you a dark box when you want to play. The goal throughout is the same: a dark, matte interior for the image, one soft light for the ball, and full control over any daylight that wants to wash the screen. Solve those three and the enclosure looks as good as builds costing far more on the projector alone.