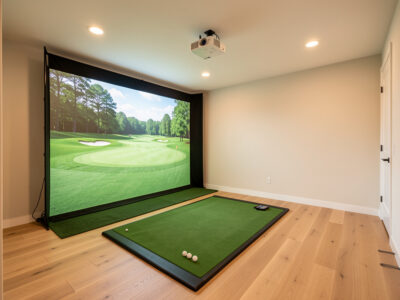
A mid-range golf sim enclosure pairs a commercial multi-layer impact screen with a rigid frame, sized to your room and built for safe bounce-back. Budget roughly $700 to $1,600 for the enclosure and screen together, and treat the screen as the part you look at every shot — it deserves more of that money than the frame does. Done right, it is the component that makes a sim a room you want to be in.
I framed my own enclosure from EMT conduit and hung a commercial screen, and the lessons that mattered were not the ones the kit listings advertise. They were screen slack, the bounce-back gap, and sizing the opening to my actual room rather than a brochure photo. This guide is the mid-range-specific version: what screen to buy, how to size it, and where a DIY frame saves money that belongs in the screen instead.
Screen First, Frame Second
In a mid-range build the screen is the priority and the frame is the support structure. A commercial multi-layer impact screen takes the ball quietly, holds a taut and sharp projected image, and survives a winter of full swings; a thin budget screen wrinkles, ghosts the picture, and wears through faster. You will spend whole evenings looking at this surface, so it is the wrong place to economize.
The frame’s job is to hold that screen tight, square, and at a safe distance from the wall — and that is a job a DIY build does as well as a kit for far less. I cover the material trade-offs in impact screen material and the build itself in my DIY enclosure guide. As an Amazon Associate I earn from qualifying purchases. A proper commercial impact screen is the line item that most changes how the finished sim looks and lasts.

Sizing the Screen to Your Room
Screen size is set by your room, not your wishlist. The opening has to clear your swing, fit your ceiling, and sit at a safe distance from the hitting position, and those constraints usually decide the size for you. Most mid-range home rooms land on a screen in the range below, but the right answer is whatever your tape measure allows with safe margins.
| Room type | Typical screen | Watch for |
|---|---|---|
| Tight spare room | Smaller 4:3 panel | Ceiling and side clearance |
| Standard basement | Mid-size near-square | Bounce-back gap behind screen |
| Garage bay | Larger wide panel | Cold temps, depth for flight |
Get the room dimensions settled before you buy a screen, because returning an oversized panel is a miserable way to learn this. Work through the room requirements guide first, and mind the screen distance that keeps the picture sharp and the hitting position safe. The overall component order for this tier lives in the mid-range build hub.
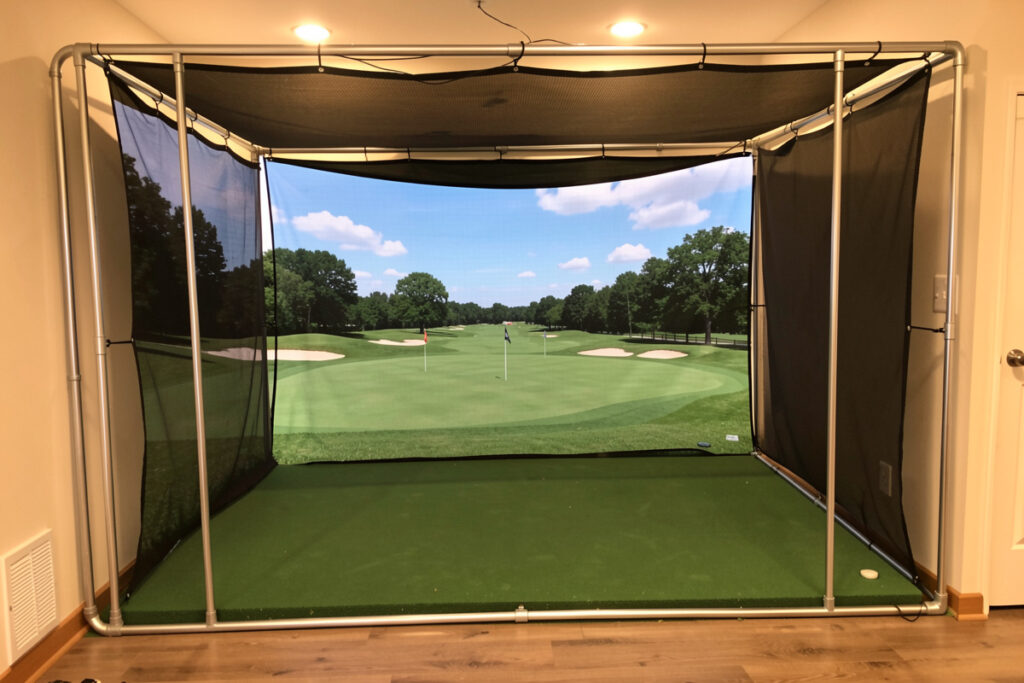
The Frame: Where DIY Earns Its Keep
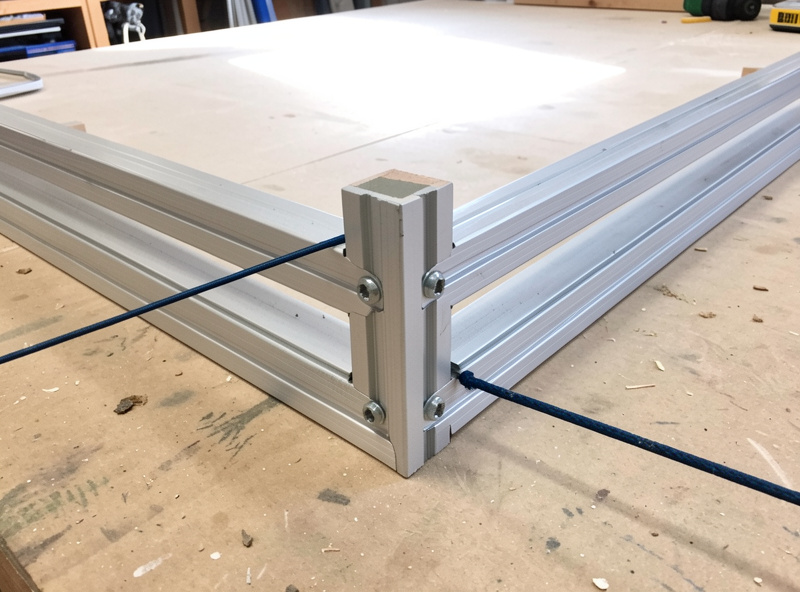
The frame is where a mid-range builder saves the most without sacrificing anything. A rigid EMT conduit frame holds a screen as well as a commercial kit at a fraction of the cost, and the savings move straight into screen quality where they matter more. When I framed mine, the build was a weekend of work and the result has held square through years of full swings.
The two details that matter are tension and squareness: the screen must hang taut and flat, with no slack that lets the image ripple, and the frame must stay square so the picture is not trapezoidal. My step-by-step is in the EMT conduit frame walkthrough. If you would rather buy a frame, that is fine too — just put the saved effort, not saved money, into screen choice. A pre-made enclosure kit is a reasonable shortcut if your time is worth more than the cost.
Bounce-Back and Slack: The Safety You Cannot Skip
The two things that keep an enclosure safe are screen slack and the gap behind it. Screen slack lets the surface give and decelerate the ball instead of firing it straight back; the gap behind the screen ensures a fast shot never drives the ball into the wall. Get these wrong and a flushed driver becomes a projectile aimed back at you, which is the one mistake in a sim build you genuinely cannot afford.
This is non-negotiable geometry, not a preference. I treat it as the first safety check on any build, above picture quality or immersion. The full reasoning — how much slack, how big a gap, when to add netting — is in bounce-back safety. Build the enclosure to be safe first and good-looking second; the two are not in conflict, but the order matters.
Lighting, Blackout, and Screen Care
A mid-range enclosure is only as good as the room around it. Stray light washes out the projected image, so blackout and controlled lighting are part of the build, not an afterthought — a darker room makes a mid-tier projector look a tier better. The screen also needs the right care to keep its picture, because impact screens collect ball marks and dust that dull the image over time.
I keep my room lighting controllable and clean the screen on a schedule, and both make a visible difference. The lighting setup is in enclosure blackout and lighting, and the maintenance routine is in how to clean an impact screen. These are the small habits that keep a mid-range build looking like a premium one well into its second and third winter.
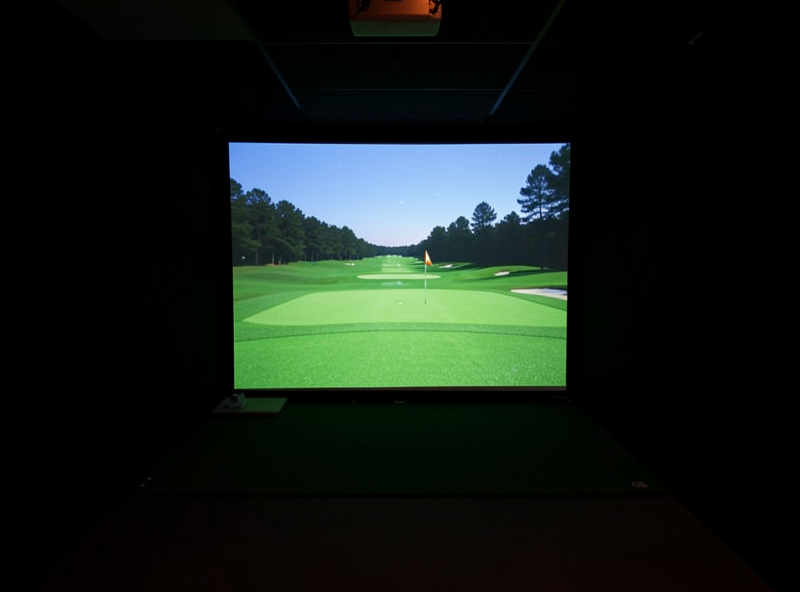
Pairing the Projector to the Enclosure
The enclosure and the projector are one system, not two purchases. A short-throw projector mounted and keystone-aligned to fill the screen exactly is what turns a good screen into a good picture; a misaligned projector wastes the screen you paid for. Size the projector to your throw distance and mount it where you never cast a shadow on your own shot — the throw ratio matters more than the resolution at this tier.
I had already fought a projector into a sim-racing rig before I ever hung an impact screen, and the alignment lessons carried straight over. The full projector reasoning, including when a TV is the better call, is in projector versus TV. A short-throw projector matched to your enclosure completes the picture.
When to Spend Up, When to Hold
Within the $700 to $1,600 band there are real choices about where the extra money goes, and not all of them pay off. Spending up on screen quality always pays — a better screen is quieter, sharper, and longer-lasting, and you feel it every shot. Spending up on a larger screen pays only if your room can actually use the size without crowding your swing or the bounce-back gap; a big screen jammed into a small room is a downgrade dressed as an upgrade.
Where I would hold the money is on frame fanciness. A powder-coated branded frame does the same structural job as a square, well-tensioned DIY conduit frame, and nobody hitting balls into it can tell the difference once the screen is hung. The same goes for cosmetic side curtains before the safety geometry is sorted — make the enclosure safe and the picture sharp first, then add the trim that makes it look finished. Get that order right and a mid-range enclosure carries the whole build, anchoring a photometric setup just as comfortably as a budget one.
Frequently Asked Questions
How much should a mid-range sim enclosure and screen cost?
Roughly $700 to $1,600 for the enclosure and screen together. Put the larger share into a commercial multi-layer impact screen, since that is the surface you look at every shot, and save on the frame by building it yourself from EMT conduit.
What screen should I buy for a mid-range sim?
A commercial multi-layer impact screen. It takes the ball quietly, holds a taut and sharp projected image, and survives a winter of full swings. A thin budget screen wrinkles, ghosts the picture, and wears through faster, which makes it a poor economy.
Is a DIY enclosure frame worth it?
Yes, for most builders. A rigid EMT conduit frame holds a screen as well as a commercial kit at a fraction of the cost, and the savings move into screen quality where they matter more. The two things to get right are screen tension and a square frame.
What makes a sim enclosure safe?
Screen slack and the gap behind the screen. Slack lets the surface decelerate the ball instead of firing it back, and the gap keeps a fast shot from driving the ball into the wall. This geometry is non-negotiable and should be checked before picture quality.