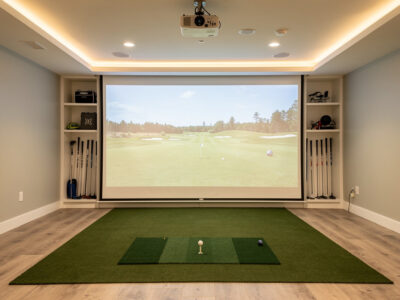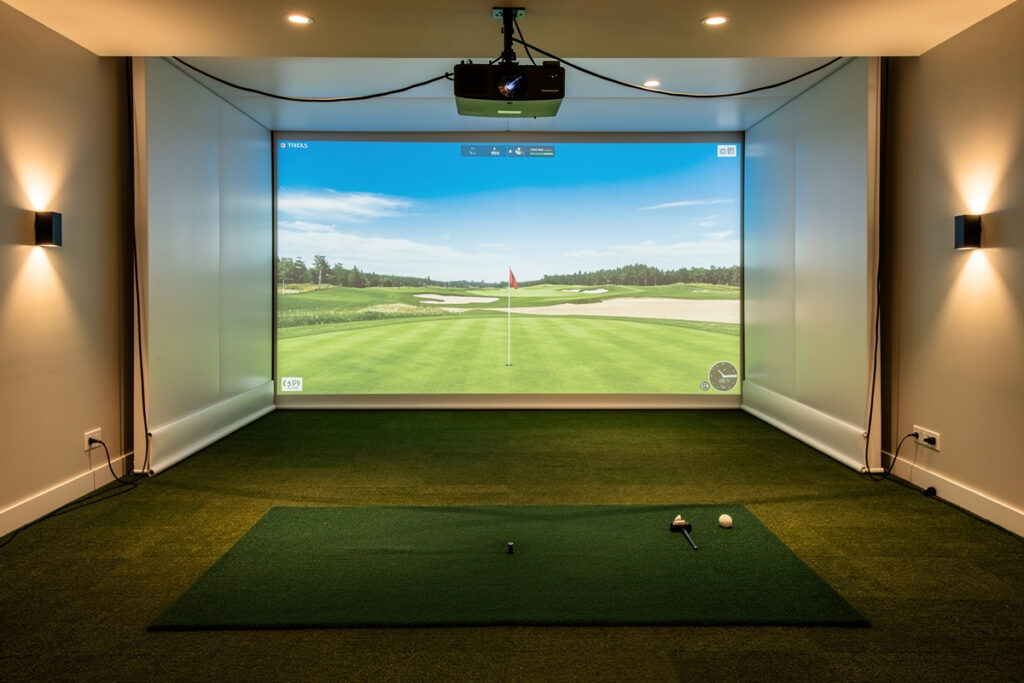
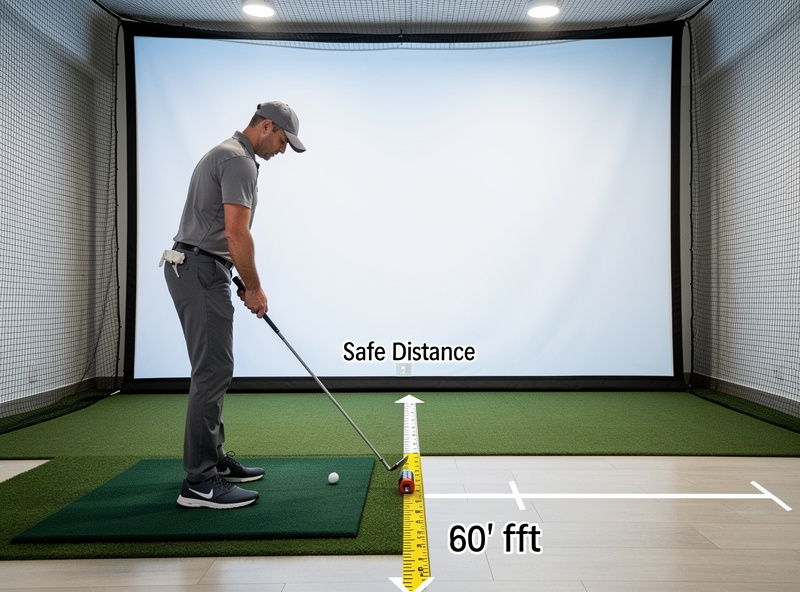
Stand at least 8 feet from your impact screen, with 10 or more feet preferred. That gap is not a comfort preference — it is a safety floor. Too close, and a mis-hit can ricochet back at you with real force; too close also shrinks the projected ball flight and distorts the image you are trying to read.
Screen distance is the dimension people treat as flexible and then regret, because it sits at the intersection of two things you cannot compromise on: ball bounce-back safety and image quality. This guide explains why eight feet is a hard minimum, how distance changes both the ricochet risk and the projected image, and how it fits into your overall room depth budget.
Why 8 Feet Is the Safety Floor
The eight-foot minimum exists because golf balls bounce back off an impact screen, and the energy of that bounce-back is highest closest to impact. A ball striking the screen near its center and rebounding has the most return speed right after contact; the further you stand, the more that energy dissipates before the ball reaches you. Standing inside eight feet meaningfully raises the odds of a fast rebound finding your shins, the monitor, or the projector.
This is the number I will not let people shave to fit a room. A tight ceiling has workarounds; a too-short screen distance just means getting hit. If your space cannot give the hitting position eight clear feet from the screen, the room is too shallow for a conventional standing build, and you should rethink the layout rather than stand closer. The screen distance is a component of the larger depth picture I lay out in the master room requirements guide.
Distance and the Projected Image
Screen distance also shapes what you see. Sitting too close to the screen compresses the apparent ball flight and can push you inside the projector’s clean image area, while a proper standback lets the projected fairway read at a natural scale and keeps your body out of the projection cone so you do not cast a shadow across your own shot. Ten feet or more gives the image room to feel like a course rather than a wall a few feet away.
There is a quality argument layered on the safety one. A good golf simulator impact screen tensioned properly and viewed from a sensible distance produces a crisp, immersive image; the same screen viewed from four feet away looks like fabric and reads every seam. Distance is part of how the screen earns its money, not just how it keeps you safe.
The Three Distances Behind the Screen Number
Your screen distance is one slice of a stack. Front to back, the room has to hold the screen offset from the wall, the ball flight from hitting position to screen, and the standback behind you. The “screen distance” most people mean — hitting position to screen — is the middle slice, and it has to coexist with the others inside your total depth.
| Hitter-to-Screen | Safety | Image Quality | Verdict |
|---|---|---|---|
| Under 8 ft | Unsafe rebound risk | Compressed, shadowed | Avoid |
| 8 to 9 ft | Acceptable minimum | Workable | Tight but usable |
| 10 to 12 ft | Comfortable margin | Natural scale | Target range |
| 12 ft+ | Generous | Most immersive | Ideal if room allows |
Screen Offset From the Wall
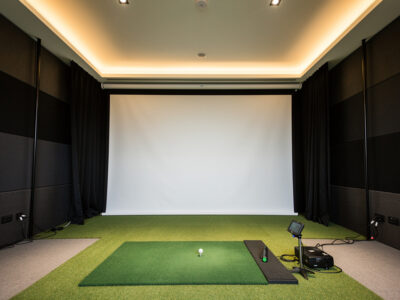
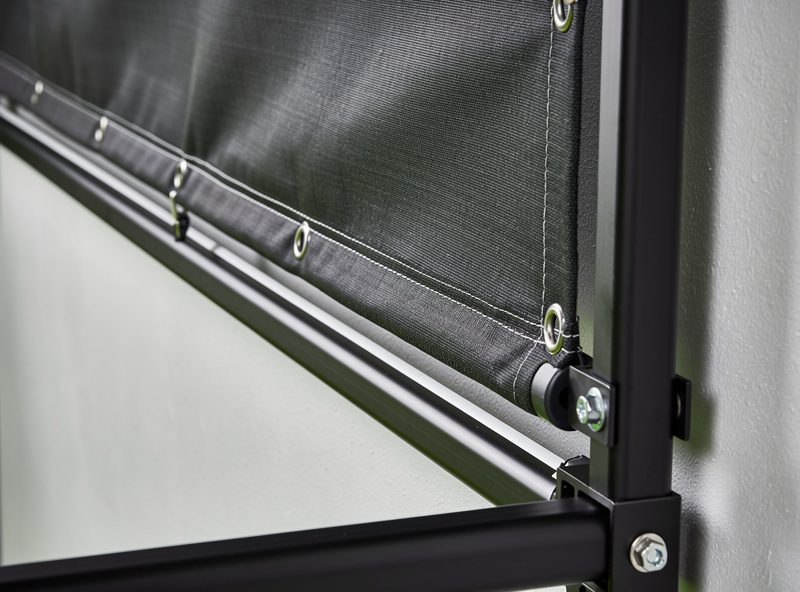
The screen itself should hang a foot or more off the back wall, not flush against it, so the impact has somewhere to give and the fabric is not driving balls straight into drywall. That offset is part of your depth budget and part of why the screen distance and the total room depth are different numbers. A screen mounted with proper standoff lasts longer and bounces back more predictably than one stretched tight against a hard wall.
This standoff also protects the wall behind the screen, which takes real repeated impact over a winter of practice. Frame the enclosure so the screen has room to flex toward the wall without contacting it at full ball speed. Builders who skip the offset tend to discover it the first time a flush-mounted screen punches a ball-shaped dent into the gypsum behind it.
Common Screen-Distance Mistakes
The errors here repeat, and every one of them traces back to treating screen distance as negotiable. The most dangerous is shaving the standback to fit a shallow room — standing at six feet because that is what the space allows, and accepting the rebound risk that comes with it. That is the one compromise I tell people to refuse outright; rethink the layout instead of standing closer to a screen that bounces balls back at you.
The second common mistake is mounting the screen flush against the wall to claw back a foot of depth, which removes the flex the screen needs and drives impacts into the drywall behind it. The third is forgetting the standback behind the ball, so the hitter-to-screen gap looks generous but the golfer’s trail elbow nearly meets the back wall. And the fourth is setting the projector before the screen distance is final, then having to remount it once the real geometry reveals a shadow or a clipped image. Each of these is free to avoid on paper and expensive to fix after the build.
Bounce-Back Behavior and Screen Tension
How a ball comes back at you depends on more than distance — it depends on how the screen is built and tensioned. A properly tensioned impact screen absorbs and redirects energy, dropping most rebounds toward the floor rather than firing them straight back. A loose or poorly hung screen bounces less predictably, and a screen pulled drum-tight against a hard backing returns more energy toward the hitter. Tension and standoff are as much a safety setting as the standback distance itself.
This is why I treat screen distance and screen build as a single safety question. Eight feet of standback protects you from the rebounds a good screen still produces; it does not license a badly hung screen at four feet. Tension the screen to the manufacturer’s spec, give it room to flex toward the wall, and then stand the safe distance back — the three together are what make a home enclosure genuinely safe to hit full shots into all winter. Screen material matters too: a multi-layer impact screen disperses rebound energy more gently than a single-layer panel, and the heavier weave tends to read cleaner under projection as well, so the durable choice and the sharp-image choice usually point at the same screen.
Lighting, Shadows, and Standback
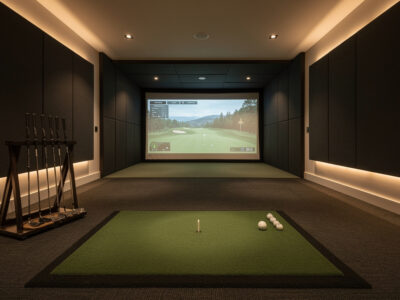
Standback distance and room lighting interact in a way that catches new builders. Stand too close and you walk into the projector’s cone, casting a shadow across your own ball flight at the worst possible moment. A proper standback keeps your body behind the projection path so the image stays clean through impact. Pair that with controllable lighting — dimmable near the screen, with usable light over the hitting area — and the image reads like a course instead of a washed-out wall.
The fix is geometric, not just electrical. Set the hitting position far enough back, mount the projector forward and high enough to clear your swing, and the shadow problem largely solves itself. A bright overhead light directly behind a too-close hitter is the classic recipe for a shadow falling across the screen exactly where you are trying to watch the shot land.
Standback for the Launch Monitor
Your screen distance also has to leave room for the launch monitor and for the trail side of your swing. A behind-ball radar unit needs clear read distance behind the strike, and you need room for your own backswing without a wall at your back. The Garmin R10 honest limits article covers exactly how much read distance that radar unit needs to produce trustworthy numbers. The screen distance sits in front of you; the standback sits behind you; both have to fit inside the room’s total depth along with the screen offset.
This is the part people forget when they fixate on the screen number alone. You can have a perfect ten-foot hitter-to-screen gap and still build a cramped room if there is a wall two feet behind the ball. Plan the full front-to-back stack — screen offset, ball flight to screen, and standback behind the ball — so the screen distance you choose actually fits the depth you have, the way the garage build guide stresses for the deepest common space.
Projector Placement Follows Screen Distance
Once your screen distance is set, the projector throw depends on it. A short-throw projector mounted overhead and forward of the hitting position keeps the image off your body and avoids shadows, but its placement is dictated by the screen size and your standback — which is why you set the screen distance first and mount the projector to it, not the other way around. A capable short-throw projector aligned to a properly distanced screen is what turns the setup from a net with numbers into something that feels like a course.
Get the order right and the build flows: lock the hitting position, set the screen distance to a safe and image-friendly number, confirm the screen offset, then place and align the projector. Reverse that order and you end up moving a mounted projector after discovering the screen distance was wrong — which is exactly the kind of avoidable rework the room-first approach is designed to prevent.
As an Amazon Associate I earn from qualifying purchases.
Keep Building
- Golf Simulator Room Requirements: The Complete Guide
- Room Width for a Golf Simulator
- The Garage Golf Simulator Reality Check
More from This Cluster
- “Golf Simulator Room Depth: The Three Zones Explained”
- “The Garage Golf Simulator Reality Check”
- “Low-Ceiling Golf Simulator Options That Actually Work”
- “Room Width for a Golf Simulator: Centered and Safe”
- “Golf Simulator Ceiling Height: How Much You Really Need”
- “Golf Simulator Room Requirements: The Complete Tape-Measure Guide”