A golf sim projector lives or dies on three numbers: throw ratio, lumens, and the height you hang it at. Get a short-throw unit with a throw ratio near 0.5, somewhere around 3,000 ANSI lumens, ceiling-mounted forward of your swing arc, and the picture problem is basically solved. Everything else is fine-tuning.
I came to projectors backwards. I had already fought one into a sim-racing rig years before I ever hung an impact screen, so when I built my golf room the projector was the part I worried about least and got wrong anyway. This guide is the order I wish I had followed: the room decides the projector, the projector decides the mount, and the mount decides how much keystone correction you will be apologising for later. Below is everything that actually matters, with the spoke guides for each decision linked where you need to go deeper.
Why a Projector, Not a TV, for a Golf Sim
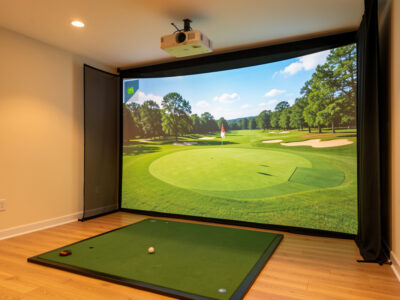
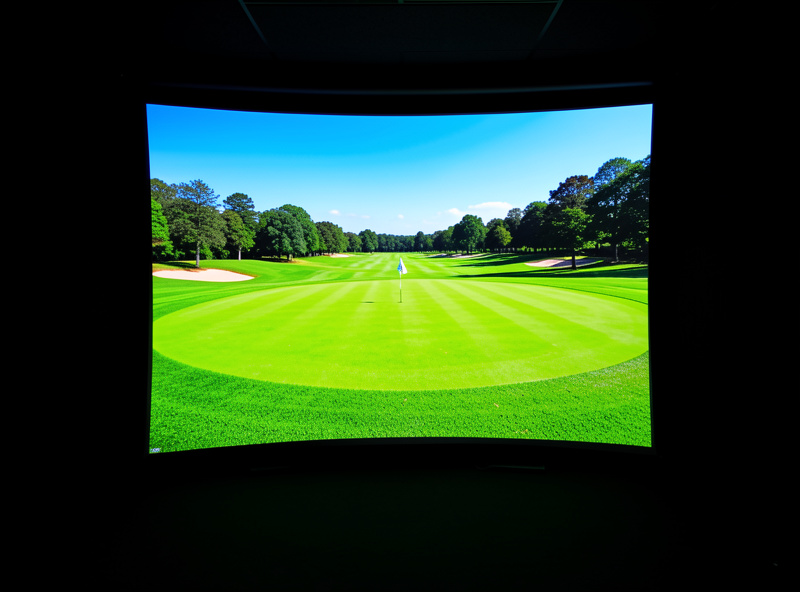
For a full-swing enclosure, a projector wins on size-per-dollar and on safety. A 100-inch-plus image off a single ceiling-mounted unit costs a fraction of a TV that size, and there is no glass panel sitting in the firing line of a shanked drive. The impact screen takes the ball; the projector never does.
The only place a TV competes is a putting-only or hitting-bay setup where the display sits off to the side and never faces a struck ball. I broke the full projector-versus-TV decision into its own piece because it genuinely depends on your room, but for a swing enclosure the projector is the default and the rest of this guide assumes one. If you are still on the fence, read projector vs TV for a golf simulator first, then come back here.
The Room Decides the Projector (Buy in This Order)
Here is the rule nobody selling projectors will tell you: spec the room first, then buy the projector that fits it. Ceiling height, image width, and projector-to-screen distance are fixed by your space. The projector is the variable you choose to match them, not the other way around.
Measure your screen width and your available mount distance before you shortlist a single model. Those two numbers give you a target throw ratio, and the throw ratio narrows the field faster than any review can. A room that only allows a four-foot mount distance in front of a wide screen forces a short-throw unit, full stop. I cover the room dimensions themselves in the complete room requirements guide, and the two numbers that matter most for projection are screen distance and room width.
Throw Ratio: The Single Most Important Spec
Throw ratio is distance-to-screen-width. A 0.5 throw ratio projects a 10-foot-wide image from five feet away; a 1.5 ratio needs fifteen feet for the same image. In a golf room you almost never have fifteen feet of clean projection distance, which is why short-throw and ultra-short-throw units dominate sim builds. When I am checking whether a specific unit fits, I run its quoted ratio through ProjectorCentral’s projection calculator against my real screen width and mount distance before it ever makes a shortlist.
The practical bands break down like this. Standard throw (around 1.2 to 1.5) needs a long room and a rear or far-ceiling mount. Short-throw (roughly 0.5 to 0.8) is the sim sweet spot, mounted on the ceiling forward of where you stand. Ultra-short-throw (under 0.4) sits almost under the screen but introduces its own shadow and alignment headaches in a swing space. I work through the math, with real room examples, in the dedicated guide on throw ratio and lumens for a golf sim. Get this number right and the projector basically installs itself.
Lumens: How Bright Is Bright Enough
Lumens are your brightness budget. In a fully blacked-out room, 2,500 ANSI lumens looks excellent on a sim screen. Add any ambient light and you climb fast: a room with daylight or white walls wants 3,500 to 4,000-plus ANSI to keep the image from washing out into grey.
The catch is that marketing “lumens” and ANSI lumens are not the same currency. Inflated LED or “peak” lumen figures can be double the honest ANSI number, so I only ever compare ANSI lumens, and I treat any spec without the ANSI qualifier as fiction. Most sim rooms should sit in the 3,000 to 4,000 ANSI band; it covers a blacked-out winter evening and survives a room that is not perfectly dark. If your space gets real daylight, read projector brightness for daylight rooms before you buy under-spec and regret it.
Resolution, Refresh, and What Your PC Can Push
1080p is the honest floor for a sim and looks crisp at sim viewing distances. 4K sharpens course detail and on-screen data, but it costs more and asks more of your graphics card, since the PC has to render the simulation at that resolution and hold a smooth frame rate. There is no point owning a 4K projector your GPU cannot feed.
In my room a mid-tier GPU runs 1080p in GSPro without complaint; pushing 4K is where the frame-rate testing actually matters and where you spend on the PC, not just the projector. Match the projector resolution to what the machine can drive at a stable frame rate. If you are building the PC alongside the projector, size the graphics card to the resolution you are projecting, not to a number on a box. A golf sim is, after all, a sim-racing rig with the wheel swapped for a driver: same projector fights, same PC math, same screen-distance ergonomics.
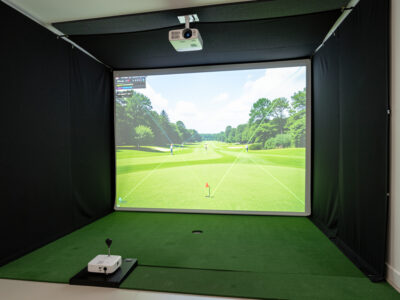
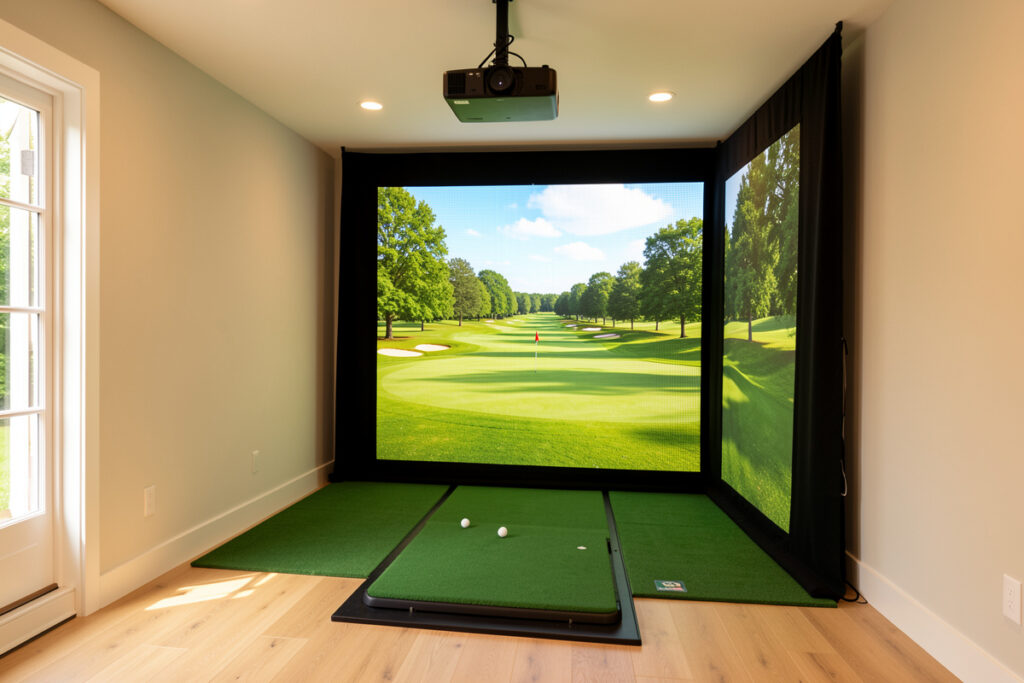
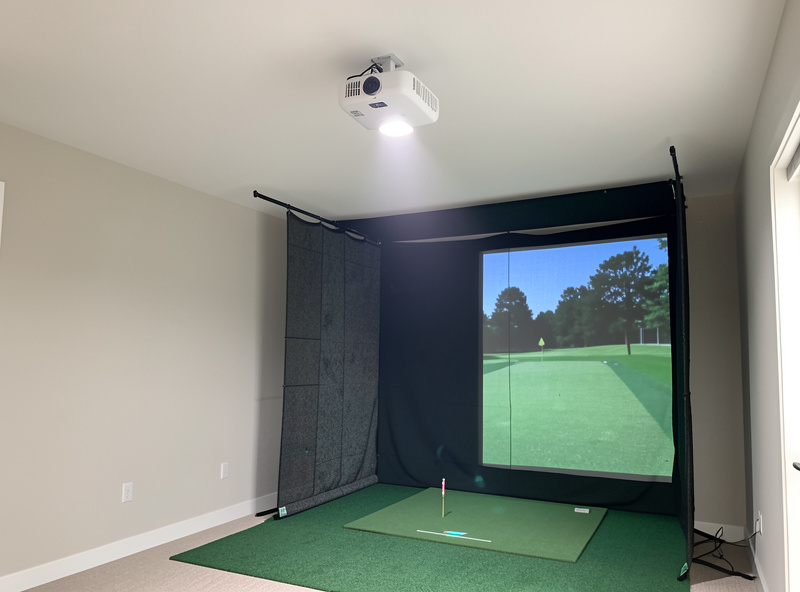
Mounting: Above and Forward of the Swing Path
The projector has to clear the swing. Mounted to the ceiling, forward of your hitting position and angled at the screen, it stays out of the club arc and casts the fewest shadows. The two failure modes are mounting it where a tall player clips it on the backswing, and mounting it where your own body throws a shadow on the screen at impact.
I measured my driver arc at full height before I drilled a single hole, then set the mount forward of that arc with clearance to spare. Cable runs, a sturdy mount rated for the projector weight, and a power source up at the ceiling all need planning before you commit. The full process, including how I found the safe forward distance, is in mounting a projector above the swing path. Do not freehand this part; a projector swinging on a cheap mount over your head is the one mistake the room will not forgive.
Alignment and Keystone: Where Most Builds Get Lazy
A ceiling-mounted projector throws at an angle, so the raw image arrives as a trapezoid. Keystone correction squares it back up, and lens shift (if your projector has it) does the same job optically with far less quality loss. The lazy build leans hard on digital keystone and lives with a slightly soft, slightly cramped image forever.
The honest order is: physical placement first, lens shift second, digital keystone only as the last small nudge. Heavy digital keystone scales the image and throws away pixels, which softens the picture and shrinks your usable screen area. I get the projector physically square to the screen as best I can, then correct the rest. The full alignment routine, including the keystone-versus-lens-shift trade-off, is in projector alignment and keystone for a golf sim.
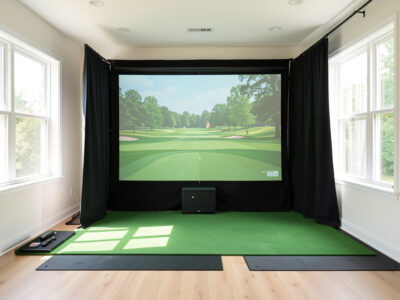
Pairing the Projector to the Screen and Room
The projector is one half of the picture; the screen and the room are the other. A bright projector on a cheap, seam-heavy screen still looks cheap, and the best screen in a room full of light spill still looks washed out. The image is a system, not a single component.
Match a quality impact screen material to your projector, and black out the room so the projected blacks actually read as black. I cover screen choice in impact screen material, the room darkening in enclosure blackout and lighting, and the safe screen build itself in the DIY enclosure guide and the EMT conduit frame walkthrough. If you want the picture to look like the showroom photos, the room work matters as much as the projector spec.
Projector Tiers for a Golf Sim: What Each Band Buys
Projectors for sim use sort into three honest tiers. The table below is how I think about the spend, by throw type and brightness rather than by brand, because the spec band is what determines whether the thing fits your room at all.
| Tier | Throw type | Typical ANSI lumens | Best for | Watch out for |
|---|---|---|---|---|
| Entry | Standard throw | 2,500-3,000 | Long, fully blacked-out rooms with rear mount room | Needs distance you may not have; dimmer with any ambient light |
| Sim sweet spot | Short throw (0.5-0.8) | 3,000-4,000 | Most home enclosures; ceiling mount forward of swing | Confirm throw ratio against your exact screen width |
| Premium | Short or ultra-short, laser | 4,000+ | Rooms with daylight or 4K builds on a strong GPU | Cost; 4K needs a GPU that can actually feed it |
Most readers land in the middle band: a short-throw unit around 3,000 to 4,000 ANSI lumens, ceiling-mounted, running 1080p or 4K depending on the PC. If you want a curated starting point, my best short-throw projector for a golf sim shortlist starts from exactly these criteria. You can also browse current short-throw golf simulator projectors on Amazon to see what the bands look like at today’s prices.
As an Amazon Associate I earn from qualifying purchases.
Lamp, LED, or Laser: The Light Engine Trade-Off
The light source inside the projector changes brightness, lifespan, and price more than the badge on the front does. Lamp projectors are cheapest up front but the bulb dims over time and eventually needs a paid replacement. LED units run cooler and last far longer, but honest ANSI brightness on affordable LED models often sits at the lower end. Laser projectors hold their brightness for years and start instantly, at a premium price.
For a winter sim that I run for hours at a stretch, I value a light engine that holds its brightness through a long session and does not need a bulb swap mid-season. If you are buying entry-level, a lamp unit is fine as long as you factor a replacement bulb into the lifetime cost. If you can stretch to laser, the consistent brightness and instant-on are genuinely worth it in a room you use every dark evening. Either way, judge the unit on its rated ANSI lumens, not on the marketing name given to its light source.
Contrast, Black Levels, and Why the Room Still Wins
Contrast ratio sells projectors, but in a sim the room sets your real black level more than the spec sheet does. A projector cannot make a pixel darker than the ambient light bouncing around the room allows. Spill light from a window, a white ceiling, or a status LED lifts your blacks to grey no matter what the box claims.
This is why I treat blackout as part of the projector spec, not a separate hobby. Dark walls, a blacked-out room, and a quality screen do more for perceived contrast than chasing a higher contrast number on a second projector. Get the room dark first and a mid-contrast projector looks deep and punchy; leave the room bright and a high-contrast unit still looks washed. The picture is the room and the projector working together, and the cheaper half to fix is almost always the room.
A Realistic Projector Budget Order
If I were spending from scratch today, I would split the display budget in a deliberate order rather than throwing it all at the projector. First, enough projector to hit the right throw ratio and 3,000-plus ANSI lumens for my light level. Second, a quality impact screen, because a great projector on a poor screen still looks poor. Third, a solid ceiling mount and the cabling to do the install safely.
Only after those three would I reach for 4K, laser, or a brighter tier, and only if the PC and room could actually use them. The most common money mistake I see is a premium projector bolted to a budget screen in a half-lit room. The image disappoints, and the owner blames the projector. Spend in the order the picture is actually built: throw ratio and brightness that fit the room, then the screen, then the mount, then the luxuries. That order has never let me down across the tiers I have built.
Setup Day: My Step-by-Step Order
When the boxes arrive, the sequence matters as much as the gear. I measure my full driver swing arc at standing height and mark the safe forward line on the ceiling before anything else. Then I dry-fit the projector at the calculated throw distance to confirm the image fills the screen edge to edge before a single screw goes in.
From there it is mount, power, and cable run; then physical squaring of the projector to the screen; then optical lens shift; and only last, a small digital keystone nudge if anything remains off. I leave focus and final geometry until the room is dark, because that is the condition I will actually play in. Rushing this and correcting everything digitally is exactly the lazy path that cost me a soft image for a season. Slow setup, sharp picture, every winter after.
The Mistakes I Made So You Do Not Have To
My three biggest early errors: I bought brightness before I confirmed throw ratio and ended up with an image that did not fill the screen from my mount distance. I leaned on digital keystone instead of placing the projector properly, and lived with a soft image for a season. And I mounted before I measured my full driver arc, then had to move the whole thing forward.
None of those were budget problems; they were order-of-operations problems. Spec the room, pick the throw ratio, confirm the lumens for your light level, plan the mount around your swing, and correct alignment physically before you touch a digital setting. Do it in that order and a mid-tier short-throw projector will out-perform a premium unit installed in a hurry. The room is the first component, every single time.
Frequently Asked Questions
What throw ratio do I need for a golf simulator projector?
Most golf sim rooms need a short-throw projector with a throw ratio between 0.5 and 0.8. That projects a 10-foot-wide image from roughly five to eight feet away, which fits a ceiling mount forward of your swing. Measure screen width and mount distance first, then match the ratio.
How many lumens does a golf sim projector need?
In a fully blacked-out room, 2,500 ANSI lumens is enough. Most builds should target 3,000 to 4,000 ANSI lumens to handle some ambient light. Only compare ANSI lumens, since inflated peak or LED lumen figures can be roughly double the honest number.
Is 1080p good enough for a golf simulator, or do I need 4K?
1080p looks crisp at sim viewing distances and is the honest floor. 4K sharpens course detail but costs more and demands a stronger graphics card to render the simulation smoothly. There is no point buying a 4K projector your PC cannot feed at a stable frame rate.
Where should I mount a golf simulator projector?
Ceiling-mounted, forward of your hitting position and angled at the screen. This keeps it clear of the club arc and minimises shadows. Measure your full driver swing arc at your height before drilling, then set the mount forward of that arc with clearance to spare.
Should I use keystone correction on a golf sim projector?
Use it only as a last small adjustment. Place the projector physically square to the screen first, use optical lens shift if available, then apply minimal digital keystone. Heavy keystone scales the image and discards pixels, leaving a softer, smaller picture.
Can I use a regular projector for a golf simulator?
Yes, if the throw ratio fits your room and the brightness suits your light level. A standard-throw projector needs a long room or rear mount, which most sim spaces lack. That is why short-throw units around 3,000 to 4,000 ANSI lumens are the common choice.