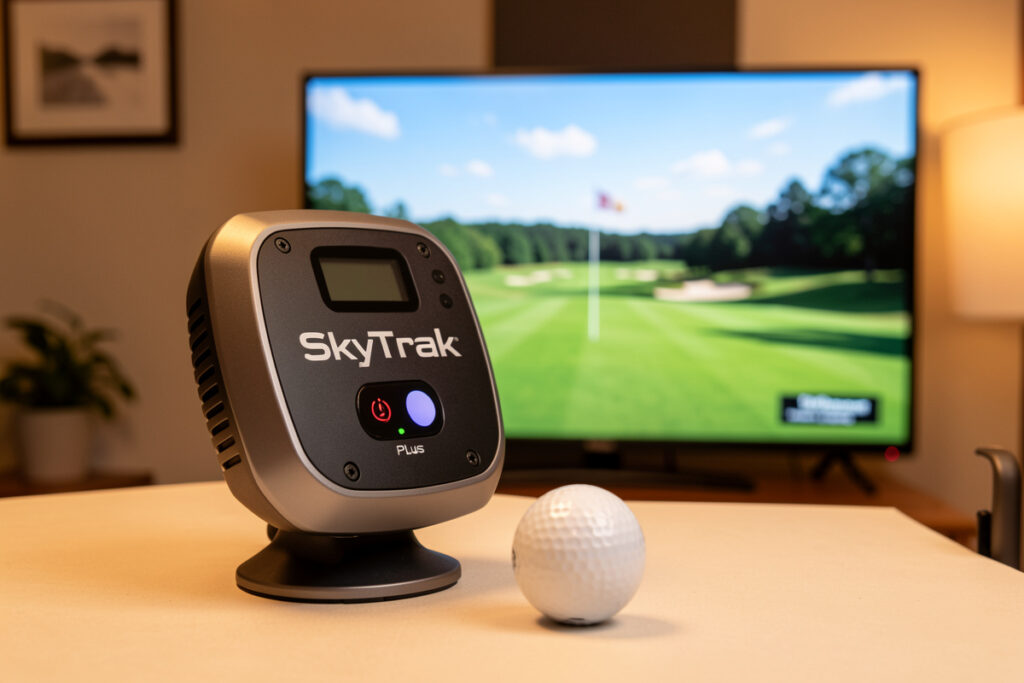
A SkyTrak+ sim build puts a photometric launch monitor at the center of the room and designs everything else around the data it produces. Budget roughly $5,000 to $6,500 for the full setup: the SkyTrak+ runs about $3,000, and the screen, projector, mat, and PC make up the rest. Built right, it is the mid-range sim that practices like a far more expensive one.
I run a SkyTrak+-class photometric unit as my data-trust workhorse, the monitor I reach for when I actually want to change something in my swing rather than just watch the ball fly. This guide is how I would assemble a build around it today — placement, the components it deserves, and the mistakes that keep this monitor from showing its real value. It is the centerpiece, but it is not the whole instrument.
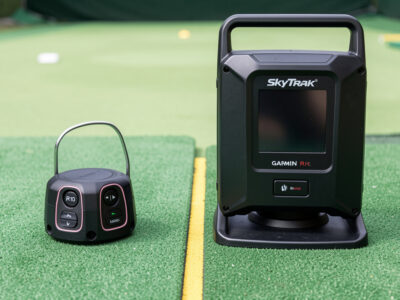
Why the SkyTrak+ Earns the Centerpiece Slot
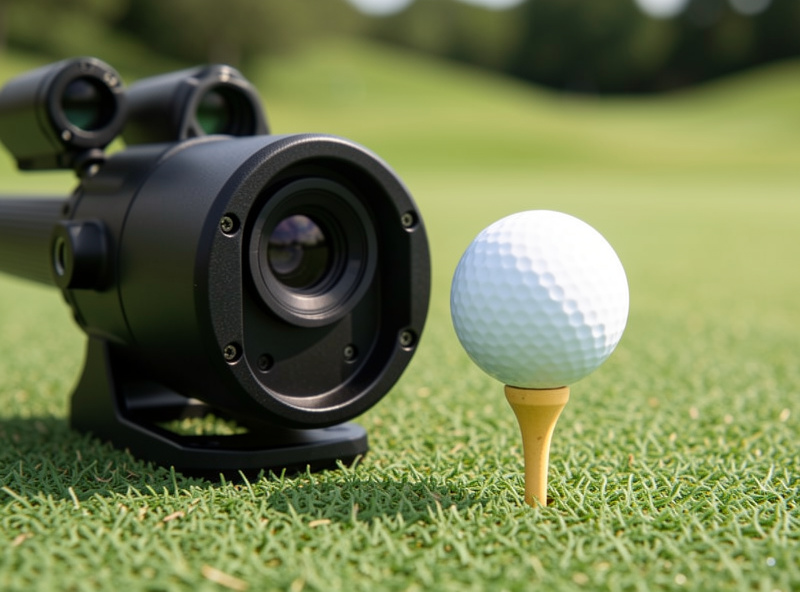
The SkyTrak+ is photometric: it photographs the ball at impact with high-speed cameras and measures launch and spin directly, rather than inferring them the way a radar does. That is the reason it anchors a build. Same session, both monitors, its spin and launch numbers stay planted on the mishits where my R10’s readings start to wander — and indoors, where ball flight is short, that stability is the whole point.
Measured data changes how you practice. With a radar you trust the direction and treat the spin as a rough guide; with the SkyTrak+ you can chase a specific spin axis or launch angle and believe that you actually moved it. The added dual-Doppler radar in the plus model also fills in club-path detail the original SkyTrak lacked. If you are weighing it against a radar, my radar versus photometric breakdown and the R10-to-SkyTrak+ upgrade guide lay out exactly what the price step buys.
Placement: Getting the Most From the Cameras
A photometric monitor is fussier about placement than a radar, and getting it wrong quietly costs you data. The SkyTrak+ sits beside the ball at a set distance and needs a clear, consistent view of the strike, so it wants a level mat surface, repeatable ball position, and lighting that does not blow out its cameras. In my room the single biggest accuracy gain came not from a setting but from marking a consistent ball position so the unit saw the same geometry every shot.
It also needs space to the side and enough room behind the ball that your stance never crowds the device. This is where the room dimensions matter: a build squeezed too tight forces the monitor into a compromised position. If you have not confirmed your space yet, work through the room requirements guide first — the monitor can only measure the swing the room lets you make.
The Components the SkyTrak+ Deserves
Once the monitor is measuring honestly, the rest of the build exists to give it a fair swing and show its output well. Here is the component set I would pair with a SkyTrak+ in a mid-range room, with the reasoning behind each slot.
| Component | Recommended slot | Why it matters with the SkyTrak+ |
|---|---|---|
| Launch monitor | SkyTrak+ (~$3,000) | The measured-data centerpiece |
| Impact screen | Commercial multi-layer (~$900) | Sharp picture, quiet impact, long wear |
| Projector | 1080p short-throw (~$700) | Bright, shadow-free, aligned to the screen |
| Hitting mat | Fairway-feel (~$500) | Honest lie so the data reflects real strikes |
| PC | Current mid-tier GPU (~$900) | Holds frame rate in GSPro at projector res |
| Software | GSPro or SkyTrak app | The daily practice and course environment |
The mat is the slot people shortchange to fund the monitor, and it is the worst trade in the build. A monitor measuring a fat strike off a forgiving turf mat reports a shot you did not actually hit. I cover why in the budget breakdown, and the full screen-and-enclosure pairing for this tier lives in the mid-range enclosure guide. As an Amazon Associate I earn from qualifying purchases. The SkyTrak+ launch monitor is the anchor; a commercial impact screen is the partner that protects its picture.
Software and the PC Behind It
The SkyTrak+ runs its own app and integrates with GSPro, which is my daily driver for its community courses and clean ball physics. GSPro is where this build comes alive, but it asks more of the PC than the SkyTrak app does, so size the machine for it. A current mid-tier GPU holds frame rate at projector resolution; going higher mostly buys you headroom you will not see on a 1080p short-throw.
Do not over-buy here to chase benchmark numbers. I sized my own machine from real frame-rate testing at the resolution the projector actually outputs, not from spec sheets. The exact requirements are in GSPro PC requirements, and the platform trade-offs are in the sim software guide. Build the PC last, once the monitor and screen are settled and you know your real output resolution.
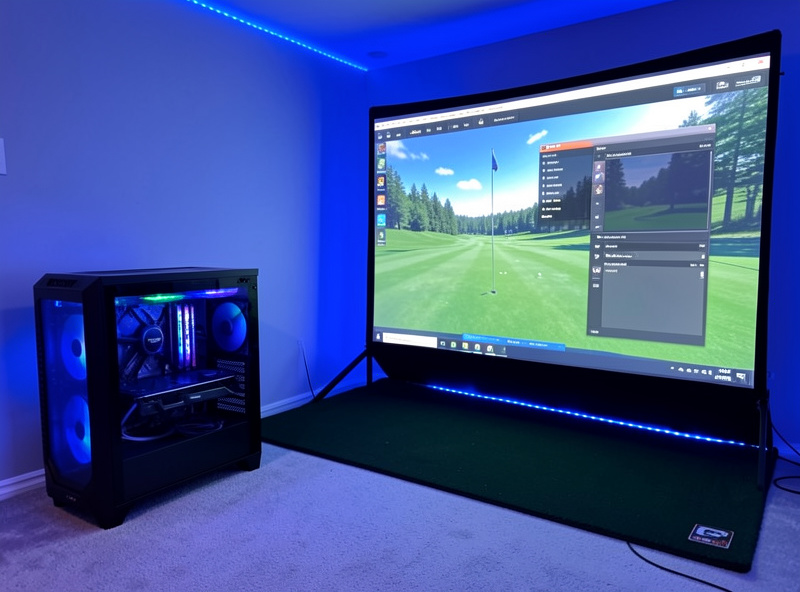
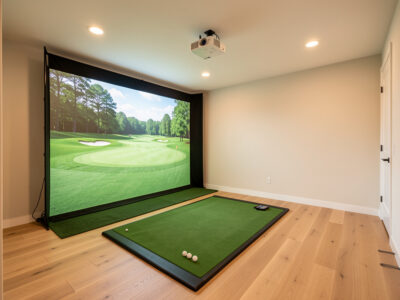
Projection and Screen for a Photometric Build
A photometric build deserves a picture worth looking at, because you will spend whole winters in front of it. A 1080p short-throw projector, mounted and keystone-aligned to fill the screen cleanly, is the right call for most mid-range rooms — the throw ratio matters more than the resolution. I had already fought a projector into a sim-racing rig before I ever hung an impact screen, and the lesson carried over: alignment beats specs.
The screen is where the SkyTrak+’s picture either holds up or ghosts. A thin screen wrinkles, wears, and smears the image; a proper multi-layer commercial impact screen stays taut and sharp. My full reasoning on the display is in projector versus TV, and the material choice is in impact screen material. A short-throw projector sized to your throw distance finishes the picture.
Is a SkyTrak+ Build Right for You?
A SkyTrak+ build makes sense when you act on your data — when you will actually practice a spin number or a launch angle, not just enjoy the ball flight. If you are still figuring out what you want from a monitor, a radar build teaches you that for less, and you can step up later without wasting the room. My upgrading from a starter monitor guide walks through that decision honestly.
But if you already know you want measured data and you have a room that passes the tape-measure test, this is the build I would point you to first in the whole mid-range band. The monitor is the part you keep for years; everything else around it can be upgraded one piece at a time. Start with the mid-range sim build hub for the full buying order, then come back here when the SkyTrak+ is the piece you are ready to anchor on.
Frequently Asked Questions
How much does a full SkyTrak+ sim build cost?
Roughly $5,000 to $6,500. The SkyTrak+ itself is about $3,000, with the remaining budget split across a commercial impact screen, a short-throw projector, a fairway-feel mat, and a mid-tier gaming PC to run GSPro at projector resolution.
Is the SkyTrak+ better than a radar monitor?
For indoor practice, yes. It is photometric, measuring launch and spin with high-speed cameras instead of inferring them like a radar. Its numbers stay stable on mishits and short indoor ball flights, which is exactly where budget radar units start to wander.
Does the SkyTrak+ need special placement?
Yes. It sits beside the ball and needs a clear, consistent camera view, a level mat, a repeatable ball position, and lighting that does not blow out its cameras. Marking a consistent ball position was the single biggest accuracy gain in my own room.
What PC do I need for a SkyTrak+ and GSPro?
A current mid-tier GPU is enough to hold frame rate in GSPro at 1080p projector resolution. Going higher mostly buys headroom you will not see on a short-throw projector. Size the machine for GSPro, since it asks more of the PC than the SkyTrak app does.
Can I upgrade to a SkyTrak+ later instead of buying it first?
Yes, and for many people that is the smarter path. Start with a radar build to learn what you want from your data, then drop a SkyTrak+ into the same room later without wasting the screen, projector, or mat. The room and enclosure carry over completely.