The right golf sim budget split puts no more than about half your money into the launch monitor and spends the rest on the room, screen, mat, projector, and PC. For a $5,500 mid-range build that means roughly $3,000 on the monitor and $2,500 across everything else. Spread this way, the build practices better than one that pours 70% into the monitor and nets the rest.
I have built every tier of home sim, and the single most expensive mistake I see is treating the launch monitor as the whole purchase. The monitor only keeps score; the room, the mat, and the screen are what you actually practice on. This is the budget breakdown I would hand someone before they spend a krona — percentages first, then where each dollar earns its keep.
The Split That Actually Practices Well
A balanced mid-range build lands near a 50/15/12/10/13 split across monitor, enclosure-and-screen, projector, mat, and PC-plus-software. The monitor is the largest single line, but it is barely half the build — and that ratio is the whole secret. The other half is what gives the monitor a fair, repeatable swing to measure and a picture worth standing in front of all winter.
Below is how that looks at the two price points most people actually build at. These are the allocations I would target, not theoretical maximums. The percentages hold steadier than the dollar amounts as you move up the band.
| Component | Share | $3,000 build | $5,500 build |
|---|---|---|---|
| Launch monitor | ~50% | $700 (radar) | $3,000 (photometric) |
| Enclosure + screen | ~15% | $700 | $1,000 |
| Projector | ~12% | $600 | $700 |
| Hitting mat | ~10% | $350 | $500 |
| PC + software | ~13% | $650 | $800 |
Notice the radar build spends a smaller share on the monitor — a budget radar leaves more room for a good screen and mat, which is exactly why a $3,000 build can practice so well. The fuller buying logic lives in the mid-range sim build hub, and the photometric-anchored version is the SkyTrak+ build guide.

Why the Launch Monitor Caps at Half
The launch monitor is the loudest decision and the most reversible one. You can upgrade it later without touching the rest of the build, so it is the wrong place to overspend early. Cap it near half the budget and you keep enough for the components that are harder to change after the fact — the screen, the mat, and the room itself.
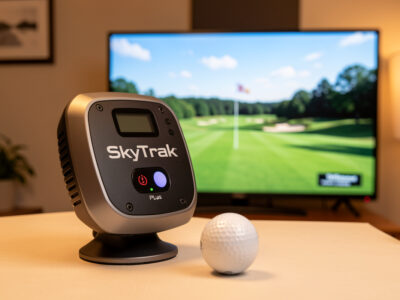
The monitor’s job is to measure the swing the room lets you make. A $3,000 monitor in a cramped room where you swing tentatively gives worse data than a $700 radar in a room where you make your real swing. That is why I treat the monitor as a ceiling, not a floor. For choosing within the budget tier, which budget data to trust and the best monitor under $1,000 keep you from overpaying for numbers you cannot rely on. As an Amazon Associate I earn from qualifying purchases. The Garmin R10 anchors the budget end of this split.
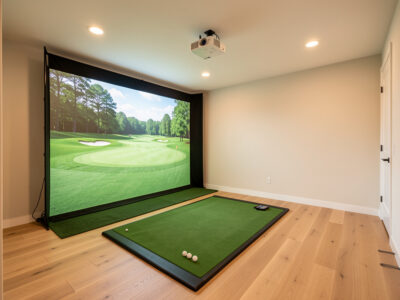
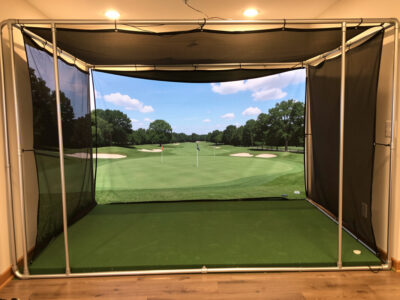
The Screen and Enclosure: 15% You Will Not Regret
Fifteen percent on the enclosure and screen sounds like a lot until you realize this is the part you look at every single shot. A commercial multi-layer impact screen on a rigid frame takes the hit quietly, holds a sharp picture, and lasts; a thin screen wrinkles, ghosts the image, and wears out. This is the line people raid to fund the monitor, and it is the rob-Peter-to-pay-Paul move that haunts the finished build.
You can save real money by framing the enclosure yourself — I built mine from EMT conduit — and putting the savings into screen quality. The material choice is in impact screen material, the build in my DIY enclosure guide, and the tier-specific sizing in the mid-range enclosure guide.
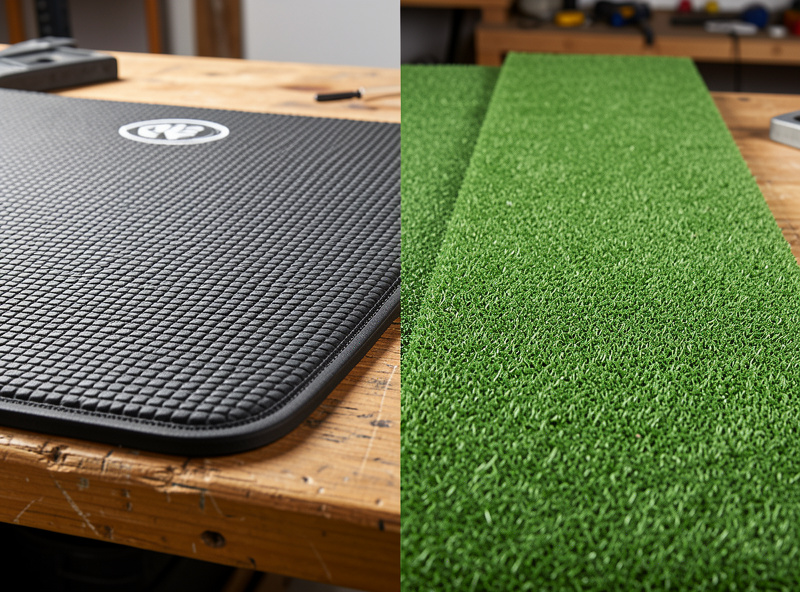
The Mat: 10% That Protects Your Data and Wrists
The mat is the line people cut first and regret most. A budget turf mat gives a fat shot a perfect lie it never earned, hiding the exact mistake you bought the monitor to find, and it sends impact shock up the shafts into your joints. A fairway-feel mat lets the club interact honestly with the surface and absorbs the strike. Ten percent of the budget here is not a luxury; it is what keeps the other 90% honest.
On my mat, the jump from a budget surface to a fairway-feel one showed up as both better wrist comfort and more honest fat-shot feedback. A monitor measuring strikes off a dishonest mat is measuring a lie, no matter how good the monitor is. A quality fairway-feel hitting mat is the cheapest honesty you can buy.
Projector and PC: The Last 25%
The projector and PC round out the build, and both are easy to overspend on. A 1080p short-throw projector, well aligned, beats an expensive misaligned one — throw ratio and placement matter more than lumens or resolution at this tier. Twelve percent is plenty. The display reasoning is in projector versus TV.
The PC only needs a current mid-tier GPU to hold frame rate at projector resolution; chasing benchmark numbers buys headroom you will never see on a short-throw. I sized mine from real frame-rate testing, and the requirements are in GSPro PC requirements. Software is a recurring cost, not a one-time line — budget for it across the winter, as the sim software guide lays out.
Where to Put Extra Money (and Where Not To)
If you have room in the budget, the highest-return upgrade is almost never the next monitor tier — it is the screen and mat. A bigger, better screen and a more honest mat improve every shot you hit; a fancier monitor only improves the numbers if you act on them. The exception is if you have outgrown a radar and genuinely practice your data, in which case the photometric jump is worth it, as I break down in the R10-to-SkyTrak+ upgrade.
Where not to spend: a 4K projector on a 1080p workflow, a top-tier GPU for 1080p output, or a premium monitor for a room that cannot swing a driver. Get the split right and a $5,500 build out-practices setups that cost twice as much.
Frequently Asked Questions
How should I split a golf sim budget?
Roughly 50% launch monitor, 15% enclosure and screen, 12% projector, 10% mat, and 13% PC and software. For a $5,500 mid-range build that is about $3,000 on the monitor and $2,500 across everything else. The percentages hold steadier than the dollar amounts as you move up.
How much of the budget should the launch monitor be?
No more than about half. The monitor is the most reversible decision in the build and the easiest to upgrade later, so it is the wrong place to overspend early. Capping it near 50% leaves enough for the screen, mat, and room, which are harder to change after the fact.
What is the most under-budgeted component?
The hitting mat. People cut it first to fund the monitor, but a cheap turf mat gives fat shots a perfect lie they never earned and sends impact shock into your joints. Budget around 10% so the monitor measures honest strikes instead of a flattering lie.
Can a $3,000 build practice well?
Yes. A radar monitor like the Garmin R10 in a proper enclosure with a good screen and mat practices well for direction, gapping, and tempo. A budget radar uses a smaller share of the budget, which leaves more for the screen and mat that you actually practice on.
Where should I put extra money if I have it?
Usually the screen and mat, not the next monitor tier. A better screen and a more honest mat improve every shot you hit, while a fancier monitor only helps if you act on the data. The exception is upgrading from a radar to photometric once you genuinely practice your numbers.
How much should I budget for software?
Treat software as a recurring cost, not a one-time line. GSPro and course access add up across a winter of practice, so plan for ongoing subscription spend rather than a single purchase when you size the overall budget.