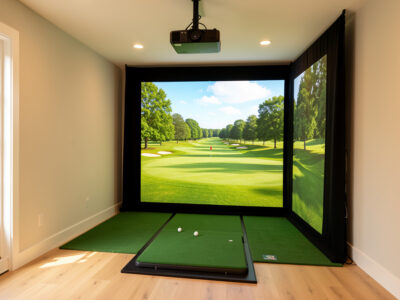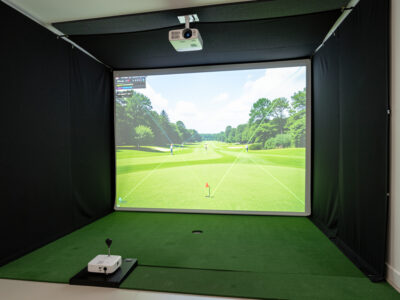
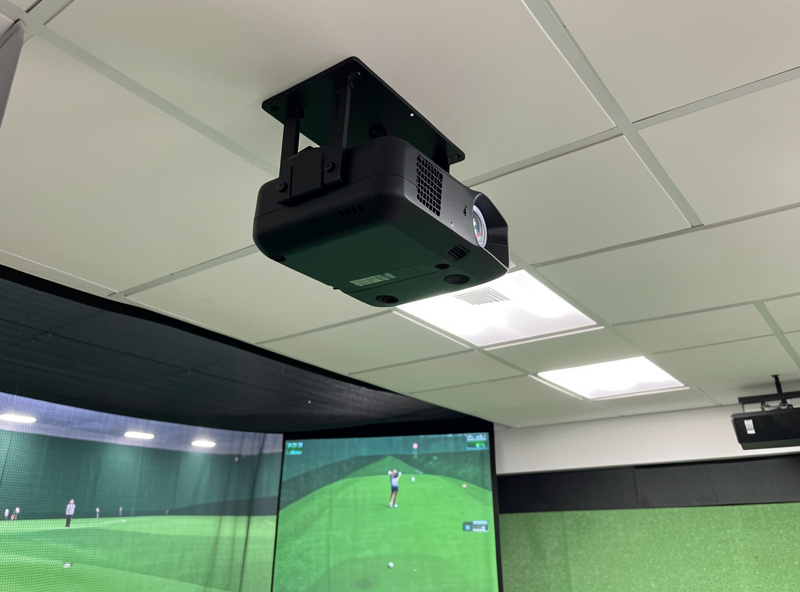
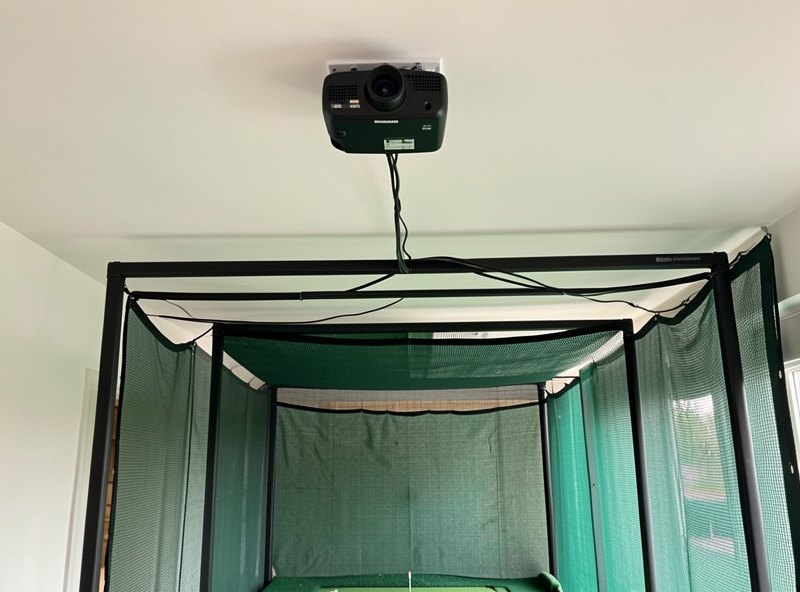
Mount a golf sim projector on the ceiling, forward of your hitting position, angled back at the screen and clear of your full swing arc. The two ways to get it wrong are mounting it where a tall player clips it on the backswing and mounting it where your own body casts a shadow at impact. Measure the swing first, drill second.
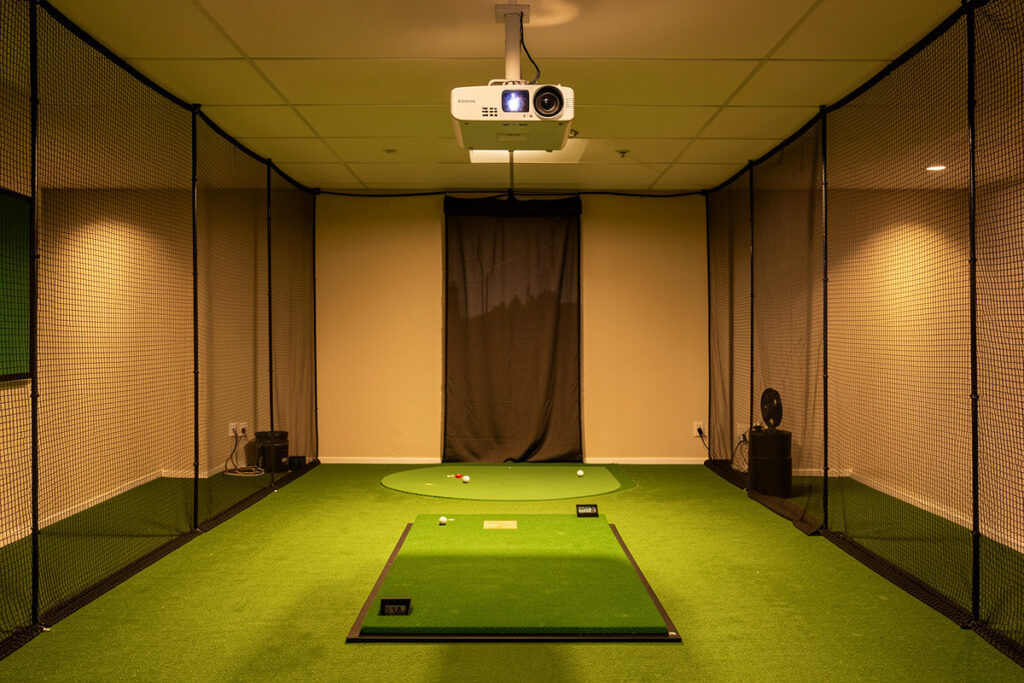
This is the part of a projector build I respect the most, because it is the one with a real consequence: a heavy projector hanging over your head while you swing a driver as hard as you can. I had already mounted a projector over a sim-racing rig before I ever did it for golf, and the golf version is less forgiving, because the club arc reaches places a steering wheel never does. Here is exactly how I find the safe position and hang the unit so it stays put and stays out of the way.
Find Your Swing Arc Before Anything Else
The single measurement that drives the whole mount is your full driver swing arc at your standing height. Take a driver, set up where you will actually hit, and slowly trace your fullest, longest backswing and follow-through, noting how high and how far back the clubhead travels. That swept volume is the no-go zone for the projector, with clearance to spare.
Do this at your real height and your real swing, not a cautious half-version, because the one time you catch the projector will be the one full-blooded drive you forget to hold back on. I mark the highest and furthest-back point the clubhead reaches on the ceiling and walls, then plan the mount well forward of that line. Ceiling height feeds directly into this; if your room is tight up top, read the ceiling height guide first, because a low ceiling changes both the swing and the mount.

Forward of the Swing, Aimed Back at the Screen
With the swing arc mapped, the projector goes forward of it, between you and the screen, mounted high and angled back toward the screen. This position keeps it out of the club path entirely and, just as importantly, keeps it out of the light path so your body does not throw a shadow on the screen as you stand to hit. Forward and high is the sweet spot for both.
The exact forward distance is set by your projector’s throw ratio: it has to sit far enough back from the screen to fill it, but forward enough to clear your swing. Sometimes those two demands conflict in a short room, which is the whole reason short-throw projectors dominate sim builds. I run the exact distance a given unit needs through ProjectorCentral’s projection calculator so I know whether one mount point can satisfy both the fill and the clearance before I commit a hole. If you have not locked your throw ratio yet, work through throw ratio and lumens and pick a unit from the short-throw shortlist before you finalize the mount point.
Shadows: The Mistake You Only See Later
A projector mounted too far back, behind or directly over where you stand, casts your shadow onto the screen exactly where you are trying to watch ball flight. It is maddening, and it is invisible until you stand in your hitting position with the projector running. Always dry-test the light path with your body in the address position before you commit the mount.
Mounting forward of your stance solves it, because the light travels from in front of you to the screen, leaving your shadow behind you where it does no harm. I dry-fit the projector and physically stand at address to confirm no part of me lands on the screen at setup or at the top of the backswing. Five minutes of standing and checking saves a permanent annoyance. The light path is as much a part of mount planning as the swing arc is.
The Mount Hardware: Do Not Cheap Out
The mount itself has one job: hold a heavy projector dead still, over your head, for years. Use a sturdy ceiling mount rated comfortably above your projector’s weight, fixed into ceiling joists or solid blocking, never into drywall alone. A projector that drifts out of alignment because the mount flexes will have you re-aligning it constantly, and a projector that falls is a genuine hazard.
I anchor into joists, use a mount with fine adjustment so I can square the image without fighting the hardware, and check it is locked solid before I trust it. An adjustable mount also makes the later alignment far easier, because you can square the projector physically instead of leaning on digital keystone. The mount and the alignment are linked: a rigid, adjustable mount is what lets you do projector alignment properly. Spend on the mount; it is the cheapest insurance in the whole build.
Cable Runs and Power at the Ceiling
A ceiling projector needs both signal and power up there, and planning that before you mount saves an ugly retrofit. Run the video cable from your PC to the projector location, and get mains power to the unit, ideally tidied into the ceiling or wall rather than dangling. Long HDMI runs sometimes need an active or fiber cable to hold a stable signal at distance, especially at higher resolutions.
I plan the cable route and power source as part of the mount, not as an afterthought, so the finished build looks clean and nothing sags into the swing or the light path. If you are framing an enclosure, this is the moment to integrate the cable run into the structure; the EMT conduit frame walkthrough shows how the frame can carry cabling neatly. Tidy cable runs are not just cosmetic; a cable drooping into the swing zone is its own hazard.
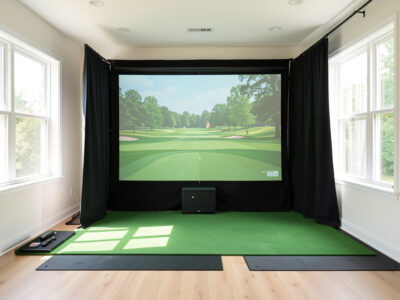
When the Ceiling Will Not Work: Floor and Wall Options
Not every room allows a clean ceiling mount. Low ceilings, concrete you cannot drill, or a finished space you do not want to alter can all push the projector somewhere else. A floor or shelf mount well forward of and beside your stance, or a high wall mount, can both work, as long as the unit still sits forward of the swing and out of the light path to avoid shadows. The same two rules govern every position.
The trade-off with floor and low side mounts is alignment: throwing the image from off to one side or from below introduces more keystone distortion, which costs you sharpness when you correct it. I treat these as fallbacks rather than first choices, used when the ceiling genuinely is not an option. If a low ceiling is your constraint, the broader compromises are covered in the ceiling height guide, and a short-throw unit with good lens shift makes an off-axis mount far more workable. Whatever the surface, the projector must clear the swing and not cast your shadow, every time.
Vibration, Drift, and Holding Your Alignment
A projector that is perfectly aligned today but drifts over weeks is almost always a mount problem, not a projector problem. Every full swing sends a small shock through the room, and a mount with any flex slowly works the image out of square, so you find yourself re-aligning every few sessions for no obvious reason. A rigid mount into solid structure simply does not move.
This is why I anchor into joists or solid blocking rather than drywall anchors, and why I pick a mount with no slop in its joints once locked. The reward is an image that stays square for the life of the build, so the alignment work you do once stays done. A wobbly mount turns alignment into a recurring chore and quietly softens your image as keystone creeps back in. Rigidity up top is what makes the careful alignment routine hold rather than needing constant redoing.
A Quick Pre-Drill Checklist
Before a single hole goes in the ceiling, I run through the same short list every time. Have I traced my full driver arc at standing height and marked its limits? Does my chosen mount point sit forward of that arc with real clearance? Have I confirmed the projector can fill the screen from that distance at its throw ratio? Have I stood at address and checked that neither I nor the mount casts a shadow on the screen?
And finally: is the mount rated above the projector weight, and is it going into joists or solid blocking, with cable and power routes planned? If every answer is yes, I drill. If any answer is no, I stop and fix it first, because a mount is a commitment you do not want to relocate after the fact. This checklist takes a few minutes and has saved me from every mounting mistake I might otherwise have repeated from my first build.
My Mounting Order, Start to Finish
Pulled together, the sequence is: trace the full swing arc and mark its limits; confirm the throw distance your projector needs to fill the screen; pick a mount point forward of the swing and high enough to clear it; dry-fit and stand at address to check for shadows; anchor a rated, adjustable mount into solid structure; run cable and power; then move on to alignment. Each step depends on the one before it.
The thread running through all of it is that the swing and the room come first and the projector fits around them, the same room-first order that governs the whole build. Get the mount right and alignment becomes a quick job; get it wrong and you fight shadows, flex, and a club that keeps finding the one object you hung in its path. For the safety side of having gear and a ball in the same room, the bounce-back safety guide is worth a read, and the main projector guide ties the mount together with every other projector decision.